Learn how to prepare your central heating system for winter weather. Save money on heating bills, prevent breakdowns, and keep your home warm.
How to Prepare Your Central Heating System for Winter Weather
Look, I get it, appliance maintenance is boring but waiting until the first freezing night of the year to find out your furnace is broken is a nightmare you do not want to experience. When the temperature plummets and the winter winds start howling, your heating system transforms from a forgotten metal box in the basement into the most critical appliance in your entire home. If you ignore it until the freezing weather arrives, you are practically begging for an expensive emergency technician visit.
Here is the real talk: a professional HVAC company will charge you hundreds of dollars for a “winterization checkup,” yet about 80% of what they do involves basic inspection and cleaning tasks that you can easily handle yourself. You do not need professional training to get your heating system ready for the freezing cold.
At FixNest.xyz, we are committed to providing practical, money-saving, and safe DIY solutions to help homeowners and renters maintain their household systems without draining their bank accounts. Taking the time to learn how to prepare your central heating system for winter weather is the ultimate way to protect your wallet, ensure your family stays cozy, and prevent catastrophic breakdowns when you need heat the most. In this comprehensive guide, we will break down the essential pre-winter checklist, explain how different heating systems handle the cold, and give you a foolproof step-by-step proccess to prep your system like a veteran technician.
The Cost of Skiping Pre-Winter Heating Maintenance
When your central heating sits idle all summer and autumn, dust settles over the burners, electrical connections loosen slightly, and mechanical parts lose their lubrication. Forcing a stagnant system to instantly run at full blast during a freezing winter storm creates immense thermal stress.
If your system is choked by a dirty filter or blocked vents, it will suffer from restricted airflow. This restriction forces the system to run longer cycles, which causes your gas or electric bills to skyrocket. More importantly, it can cause the heat exchanger to overheat and crack. A cracked heat exchanger can leak deadly carbon monoxide gas into your home’s air supply, transforming a simple efficiency issue into a major safety hazard.
By taking an afternoon to prepare your system before the cold weather hits, you extend the operational lifespan of your equipment, maximize your energy efficiency, and ensure your indoor air remains safe to breathe.
Understanding Your System Type: Gas, Electric, or Heat Pump
Before you begin maintenance, you need to know what kind of central heating system you are working with. Different systems have unique components that require specific attention before the winter sets in.
Central Heating System Winter Preparation Overview
Heating System Type
Primary Fuel Source
Major Vulnerability in Winter
Key Pre-Winter Focus Area
Gas Furnace
Natural Gas or Propane
Cracked heat exchanger; clogged exhaust flue; pilot light failure.
Technician’s Warning: If you have an air-source heat pump, remember that it works by pulling heat out of the outdoor air—even when it feels freezing outside. If the outdoor unit becomes buried in snow or covered in a thick sheet of solid ice, it cannot breathe. This triggers your system to switch over to expensive “Emergency Heat” or “Auxiliary Heat” coils inside, which can triple your electricity bill overnight. Keep your outdoor unit clear!
Tools and Supplies Needed for Winterization
You do not need an expensive technician’s tool belt to get your system ready for winter weather. Most of these items are already sitting in your garage or utility closet:
A fresh, high-quality replacement air filter matching your system’s dimensions
A screwdriver or nut driver set (for access panels)
A flashlight or headlamp
Microfiber cloths and a soft-bristled brush
Fresh batteries for your thermostat and carbon monoxide detectors
A vacuum cleaner with a long hose attachment
Step-by-Step Guide: How to Prepare Your Central Heating System for Winter Weather
Follow this step-by-step guide systematically in the mid-to-late autumn before the freezing weather arrives.
Step 1: Perform a Thermostat and Battery Test
Start with the brains of your heating system. Pop the cover off your wall thermostat and replace the old batteries with fresh, high-quality alkaline batteries. A weak battery can cause your thermostat to lose connection with your furnace, leading to a system that refuses to turn on in the middle of a cold night. Once the fresh batteries are in, switch your thermostat from “Cool” to “Heat” and set the temperature a few degrees higher than the current room temperature. Listen closely to make sure the system fires up smoothly without short-cycling or stuttering.
Step 2: Shut Off the Power for Safety Inspections
Before you touch any internal components of your heating system, you must cut the power. Look on the side of your indoor furnace or air handler cabinet for a master switch that looks exactly like a standard light switch. Flip it to the OFF position. Next, head over to your main electrical panel and switch off the circuit breaker labeled “Furnace” or “Heating Unit.” Working inside a live system poses a major shock hazard and risks damaging delicate electronic control boards.
Step 3: Swap In a Fresh Air Filter
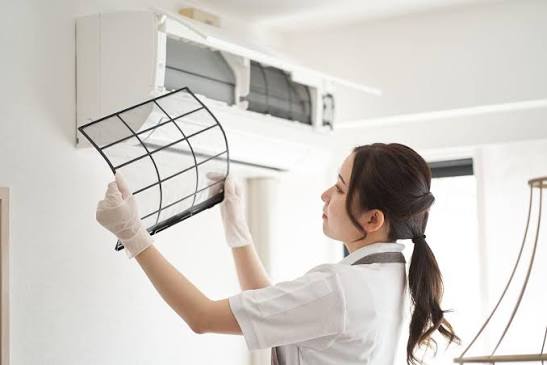
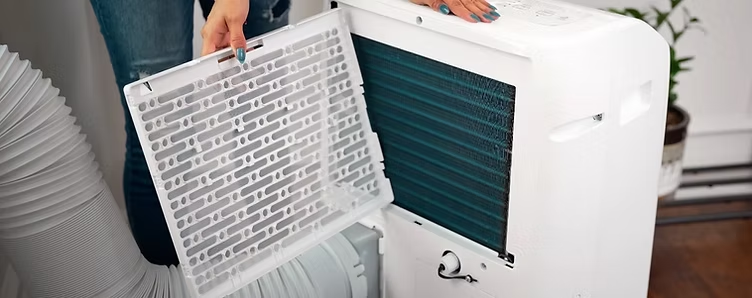
If you want to maximize your system’s efficiency and prevent overheating, you need a clean filter. Locate your filter slot, slide the old filter out, and throw it away. Take your new filter out of its plastic wrapping and check the printed airflow arrows on the cardboard edge. Slide the new filter into the slot, making sure the arrows point toward the furnace blower compartment, not away from it. If your using a standard pleated filter, commit to checking it every thirty days throughout the winter season.
Step 4: Clean the Blower Compartment and Burners
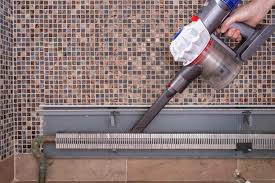
Remove the main access panel on your furnace cabinet by loosening the retention screws. Use a flashlight to inspect the interior. If you see a layer of fine dust resting on the blower motor or the burner assembly, grab your vacuum cleaner. Use the soft brush attachment to gently vacuum away the dust and lint. Be very careful not to tug on any loose wires or bend the delicate metal components. Removing this dust layer eliminates that unpleasant “burning dust” smell that often fills the house the first time you run your heat for the season.
Step 5: Inspect the Exhaust Vent Flue (For Gas Systems Only)
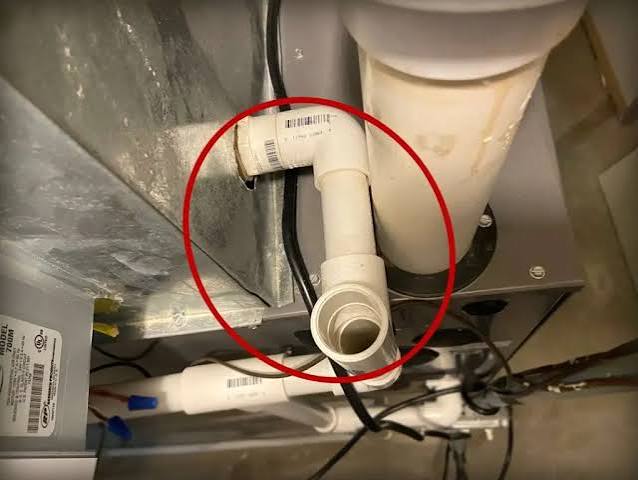
If you have a gas-powered furnace, your system utilizes a metal or PVC pipe to vent dangerous combustion gases out through your roof or side wall. Inspect the length of this pipe inside your utility room to ensure there are no loose joints, cracks, or rust holes. Head outside your home and check the exterior vent opening. Ensure that bird nests, dry leaves, or insect hives are not blocking the pipe. A blocked exhaust vent will cause toxic carbon monoxide to back up directly into your living spaces.
Step 6: Clear and Open All Supply and Return Vents
Walk through every room in your house and inspect your air registers. Ensure that heavy furniture, area rugs, drapes, or toys are not blocking your supply vents or your large return grilles. Look, I get it, rearranging furniture is a pain, but closing off vents in unused rooms to “save energy” is a myth. Closing vents increases the internal static pressure inside your ductwork, which strains the blower motor and can cause your furnace to overheat. Keep all vents completely open to ensure balanced airflow throughout the house.
Step 7: Test Your Carbon Monoxide and Smoke Detectors
Because winter weather requires sealing your windows and doors tightly, your indoor air becomes a closed loop. If a gas appliance experiences a malfunction, carbon monoxide can build up silently without your knowledge. Walk to every smoke and carbon monoxide detector in your home, press the “Test” button to ensure the siren sounds loudly, and install fresh backup batteries. Ensure you have at least one carbon monoxide detector located on every level of your home, especially right outside bedroom doors.
Step 8: Restore Power and Listen for Unusual Noises
Once your safety checks are complete, screw the access panels back onto the furnace housing securely. Flip your main circuit breaker back on and turn the furnace power switch to the ON position. Allow the system to run through a full heating cycle. Stand near the unit and listen carefully. If you hear loud grinding, squealing, or rattling noises, it could indicate a failing blower motor bearing or a loose fan belt that needs attention before the deep freeze arrives.
Troubleshooting Early Winter Heating Quirks
If your central heating acts up during your initial test run, do not panic. Use this quick matrix to diagnose the issue before you spend money on a repair call.
Winter Startup Troubleshooting Matrix
What You Experience
Potential Root Cause
DIY Corrective Action
The furnace turns on, blows warm air for a few minutes, then shuts down completely.
The system is short-cycling, likely caused by a completely clogged filter or a dirty flame sensor.
Change the air filter immediately. If the issue persists, turn off power, remove the flame sensor rod, and clean it gently with a piece of emery cloth or fine steel wool.
The fan runs constantly, but the air coming out of the vents feels lukewarm or cool.
The thermostat fan setting is set to “ON” instead of “AUTO,” or your heat pump is in defrost mode.
Switch your thermostat fan setting to “AUTO.” If you have a heat pump, wait 10–15 minutes to see if the air warms up once the outdoor defrost cycle finishes.
You smell a strong rotten-egg or sulfur odor near the furnace.
Natural Gas Leak. Gas utilities mix a chemical called mercaptan into the gas line so you can easily smell leaks.
Evacuate immediately. Do not flip any light switches, light matches, or use your phone inside. Leave the house and call your gas utility company from a safe distance.
The system won’t kick on at all, and the thermostat is blank.
The furnace door safety switch isn’t fully depressed, or a breaker tripped.
Double-check the main access panel. There is a small safety button that must be pressed down completely by the metal door frame for the system to receive power.
Keeping Your Home Sealed and Efficient
Preparing the mechanical components of your heating system is only half the battle. To ensure your central heating doesn’t have to fight a losing war against the outdoor cold, you need to minimize heat loss through your home’s envelope.
Take a walk around your windows and doors on a breezy autumn afternoon. If you feel cold air slipping past the frames, apply fresh exterior-grade caulk or install self-adhesive foam weatherstripping along the tracks. Sealing these minor gaps keeps the warm air inside your living spaces, drops the workload on your central heating blower, and helps extend the lifespan of your appliance.
Wrap Up and Next Steps
Getting your heating system ready for the winter weather doesn’t require a professional HVAC certification or an expensive maintenance contract. By dedicating a small amount of time to replacing your filters, clearing your vents, and performing basic safety checks, you ensure your home remains a warm haven all winter long while keeping your utility bills completely manageable.
Whenever you find yourself unsure about how to care for your household systems, remember that FixNest.xyz is your go-to resource for homeowners looking to extend the lifespan of their appliances and save money on repairs. We take the stress out of home maintenance by breaking down complex processes into simple, honest, and accessible steps.
If your dedicated to keeping your home running smoothly without spending a fortune, subscribe to our newsletter to receive friendly monthly appliance maintenance reminders straight to your inbox. Are you currently standing in front of your furnace and having trouble identifying a part, or is your system refusing to fire up after a filter change? Leave a comment down below with your system’s model number, and our community will help you figure it out!