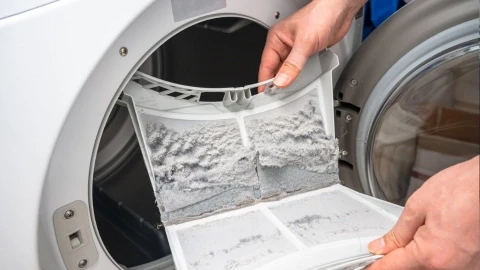
Learn the hidden signs your clothes dryer lint trap needs deep cleaning. Stop long dry times, prevent fires, and save money with this expert guide!
Signs Your Clothes Dryer Lint Trap Needs Deep Cleaning: The Complete Technician’s Manual
Look, I get it, appliance maintenance is boring but ignoring that little slot on your dryer is an absolute recipe for a laundry room disaster. You probably pull out the mesh screen after every load, swipe off the surface layer of fluff with your thumb, and slide it right back in thinking you are totally fine. Your doing your part, right?
Here is the real talk: peeling the blanket of lint off the screen is only half the battle.
Over months and years of heavy laundry loads, fine lint particles bypass that mesh screen and slip down into the dark, internal plastic housing box underneath. To make matters worse, chemical residues from liquid fabric softeners and dryer sheets float into the air current, glazing over the tiny pores of the mesh with an invisible, waxy film. The result? Your dryer slowly suffocates because it cannot push out hot, wet air.
As a senior appliance technician, I can tell you that a choked lint housing is the number one cause of long dry times, blown thermal fuses, and worse—residential fire hazards. Today, we are going to look at the undeniable signs your clothes dryer lint trap needs deep cleaning, and I will show you exactly how to clean it out yourself without calling an expensive pro. Welcome back to FixNest.xyz, your ultimate digital companion for extending the lifespan of your household appliances and saving serious cash on repairs.

The Hidden Danger: Why Surface Cleaning Isn’t Enough
Every time your dryer tumbles clothes, it forces hot air through the fabrics to strip out moisture. That air has to escape through the lint screen, travel down the internal chute, pass the blower wheel, and exit through the long metal exhaust wall pipe.
When the internal housing box gets packed with a dense wall of lint, or when the screen mesh gets glazed shut by chemical residue, the hot air backs up inside the cabinet chassis. This raises the internal cabinet temperatures dangerously high, forcing the machine to run much longer just to dry a single load of shirts.
If you ignore the early warnings, your machine will eventually trip its internal safety high-limit thermal fuse. When that fuse blows, your dryer will either spin with completely cold air, or it won’t turn on at all—turning a simple 10-minute maintenance task into a physical part replacement project.
Troubleshooting Matrix: Is Your Lint Trap Sufocating?
Your dryer will always drop hints when its primary air pathway is choking. Check out this diagnostic matrix to match your dryer’s current performance with the severity of your internal lint accumulation.
| Visible or Audible Symptom | Hidden Root Cause | Severity Level | Required Action |
| Clothes take 2 or more cycles to dry | Invisible chemical wax film has glazed the mesh screen pores shut. | High | Wash screen under hot water with soap immediately. |
| Lint mesh screen pops upward during a cycle | A solid plug of lint at the bottom of the housing slot is pushing it up. | Critical | Vacuum the internal trap cavity before running another load. |
| Burning smell in the laundry room | Loose stray lint fabric is falling onto the hot internal heating element housing. | Critical | Shut down the unit, unplug, and perform a deep clean. |
| Excessive lint stuck to the outside of dry clothes | Air velocity has dropped so low that lint cannot be pulled down into the chute. | Medium | Deep clean the housing and inspect the rear transition duct. |
If you notice even one of these issues developing in your laundry setup, do not ignore it. By keeping this air channel spotless using our free maintenance blueprints on FixNest.xyz, you can keep your utility bills low and double the operating lifespan of your heating components.
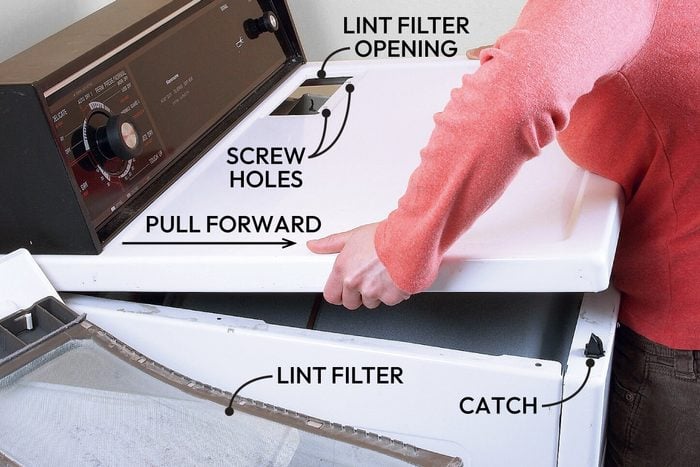
The Deep Cleaning Toolkit
You don’t need any specialized trade tools for this project. Grab these basic items from around your home before you begin:
- A long-handled, flexible dryer lint trap cleaning brush (often called a refrigerator coil brush)
- A vacuum cleaner with a long, thin crevice tool attachment
- Dish soap (Blue Dawn works best to cut through waxy sheets)
- An old toothbrush
- A Phillips-head screwdriver (depending on your specific dryer model)
- Your safety gloves
Step-by-Step Guide to Deep Cleaning Your Lint Trap Housing
Let us walk through the complete cleaning proccess safely. This guide applies whether your lint trap is located on top of the dryer cabinet or inside the front door opening.
Step 1: Disconnect the Electrical Power
Safety first, without exception. Before you stick any brushes, vacuums, or tools deep inside the internal cavities of an appliance, unplug the power cord from the wall outlet. If you have a heavy stack setup or a gas dryer where the plug is out of reach, go to your home electrical panel box and flip the breaker switch for the laundry room. We want zero risk of accidental activation while we are working near the internal wiring components.
Step 2: Remove and Test the Mesh Screen for Chemical Glaze
Pull your primary lint screen out of its slot. Swipe away any loose surface lint. Now, take the screen to your kitchen sink and pour a small cup of water directly onto the mesh.
If the water pools on top of the screen like a bucket instead of passing straight through, your screen is blinded by invisible wax from your dryer sheets and fabric softeners.
Take your old toothbrush, apply a few drops of dish soap, and scrub both sides of the mesh under warm running water. Once the waxy film dissolves, the water will flow straight through the screen. Set it aside to dry completely.
Step 3: Insert the Flexible Lint Brush Deep Into the Slot
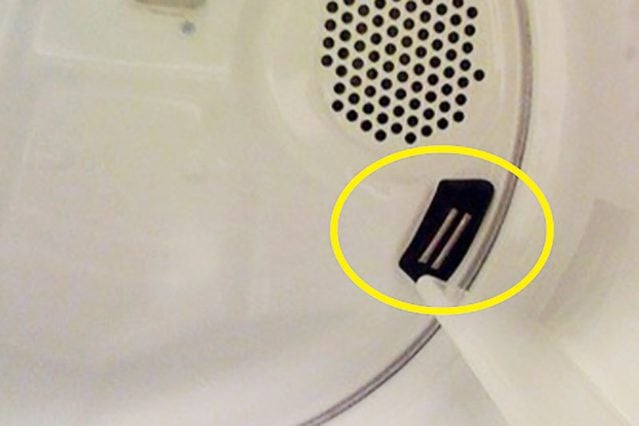
Take a flashlight and look straight down into the empty lint trap slot on your dryer. You will likely see a thick, felt-like accumulation of grey lint packed tightly along the plastic walls and at the very bottom bend of the chute.
Take your long, flexible lint brush and slide it down into the slot. Twist the handle in a circular motion while gently pushing it downward. The rough bristles will grab the caked-on lint and pull it away from the plastic walls. Pull the brush out, scrape the massive clumps of fuzz into a trash can, and repeat until the brush comes back up clean.
Step 4: Vacuum the Loose Debris Field
Once you have broken up the solid layers at the bottom of the chute with your brush, a lot of loose fluff will be sitting at the bottom of the chamber.
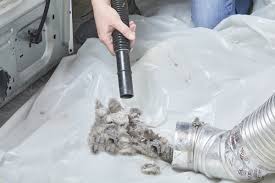
Attach your thinnest crevice tool to your vacuum hose (you can even tape a small piece of flexible vinyl garden hose to your vacuum attachment if the factory tool is too thick to fit into the slot). Push the hose deep down into the trap box and let the vacuum suck out all the loose chunks of debris. Move the hose side-to-side to ensure you clear the lower entry point where the air leads toward the internal blower fan.
Step 5: Remove the Internal Chute Cover (For Severe Blockages)
If you are still seeing the classic signs your clothes dryer lint trap needs deep cleaning—like long dry times—the lint might be jammed behind the internal housing plate.
On many front-door lint trap models (like GE or Whirlpool), you will see two or three Phillips-head screws holding the plastic grill chute in place right inside the door opening.
Carefully unscrew these fasteners, making sure you do not drop them down into the machine. Lift the plastic cover shield completely out. This exposes the entire lower collection box, allowing you to manually pull out large, dense plugs of lint that were too big to be sucked up by the vacuum. Once clear, screw the panel back on securely.
Step 6: Inspect the Base and Reinsert the Dry Screen
Take your flashlight and inspect the empty slot one last time. The internal plastic walls should look smooth and free of gray buildup. Slide your clean, completely dry mesh lint screen back into its designated track. It should slide down easily and click flush into place without any resistance.
Step 7: Restore Power and Run an Airflow Test
Plug your dryer back into the electrical outlet or flip the circuit breaker back on. Ensure your slide-in filter is clean. Turn the appliance on to a simple “Timed Dry” cycle with medium heat for 5 minutes. Go outside your house and check the exterior vent cap. You should feel a powerful, clear blast of warm air exiting the home, confirming that your machine is finally breathing freely again.
Smart Laundry Habits to Prevent Lint Buildup
Now that you have successfully restored your machine’s airflow path, your main goal should be prevention. You don’t want to repeat a complete teardown of your lint housing every couple of weeks. Adjusting a few simple choices in your laundry routing will keep your system safe and efficient long-term.
- Banish Traditional Dryer Sheets: Commercial dryer sheets operate by melting a thin layer of chemical animal fat or synthetic wax onto your clothes to eliminate static. This wax coats your internal lint screen and acts like glue, trapping loose lint inside the plastic chute. Switch to high-quality natural wool dryer balls instead—they separate your laundry naturally to speed up cycles without leaving a sticky residue behind.
- Avoid Wet Clothes In the Drum: Never leave damp clothes sitting inside a stationary dryer drum for hours. The wet fabric transfers ambient humidity into the lint trap box, causing any residual fine lint powder inside the chute to turn into a thick, papier-mâché-style paste that hardens onto the walls when the machine heats up next.
- Run a Quick Vacuum Weekly: Make it part of your weekend laundry routine to run your vacuum crevice tool down into the empty lint slot for just 20 seconds after you clear the surface mesh. Catching the fine dust before it packs down into a solid plug prevents major blockages from forming.
Recommended Dryer System Care Timeline
To keep your entire laundry setup operating safely and avoid unexpected breakdown expenses, follow this technician-approved seasonal care checklist:
[Every Single Load] -> [Clean loose surface fluff off the mesh lint screen]
         |
[Once a Month]      -> [Wash the mesh screen with soap, vacuum down the slot]
         |
[Every 6 Months]    -> [Deep clean internal trap housing cavity with a lint brush]
         |
[Once a Year]       -> [Disconnect rear transition duct and clean main wall line]
By sticking to this simple preventative routine, you prevent unnecessary thermal stress on your appliance components, effectively adding five to ten years to the operating life of your laundry system.
Your Home for Smart DIY Home Care
Taking proper care of your major household appliances shouldn’t require you to empty your wallet for professional diagnostic visits. With a little bit of time, some basic tools, and a reliable technician manual, you can easily handle these essential maintenance steps on your own terms.
If you found this troubleshooting blueprint clear and valuable, make sure to bookmark FixNest.xyz so you always have an expert-led manual ready for your next household repair project. Don’t forget to subscribe to our monthly newsletter below to receive timely maintanence checklists and practical appliance tips delivered straight to your email inbox.
Did you run into a problem trying to remove a stuck lint trap cover screw? Or maybe your machine is still running incredibly hot even after a deep housing clean? Drop a comment down below right now! I read through our community comments personally and will help you figure out exactly how to get your dryer running like brand new again. Let us get your machine breathing easy!