Learn how to keep your dryer sensor working properly for auto dry cycles. Fix damp clothes, stop over-drying, and save money with this DIY guide!
How to Keep Your Dryer Sensor Working Properly for Auto Dry Cycles
Look, I get it, appliance maintenance is boring but pulling a load of laundry out of the machine only to realize your towels are still damp after an hour-long cycle is incredibly annoying. Or maybe you are dealing with the opposite headache: your dryer runs endlessly, baking your favorite shirts until they shrink down to toddler sizes. You chose the smart “Auto Dry” or “Sensor Dry” setting to save time and energy, but lately, the machine seems totally clueless.
Here is the real talk—your dryer’s main computer brain isn’t dying, and you definitely do not need to replace the machine.
In ninety percent of these cases, the issue comes down to a tiny, inexpensive metal strip that has simply been blinded by your laundry habits. When that strip can’t “feel” the moisture in your fabrics anymore, the auto dry cycle completely breaks down.
As a senior appliance technician, I fix this exact issue constantly, and it is one of the easiest, most satisfying DIY fixes you can perform. Today, I am going to show you exactly how to keep your dryer sensor working properly for auto dry settings so you can stop wasting money on utility bills and extended drying cycles. Welcome back to FixNest.xyz, your ultimate companion for smart, budget-friendly home appliance maintenance.
The Science Behind the Moisture Sensor
Before we fix it, we need to understand how this little component functions. Most modern dryers do not rely on a simple timer clock anymore. Instead, they utilize a smart moisture sensor system to detect when your clothes are genuinely dry.
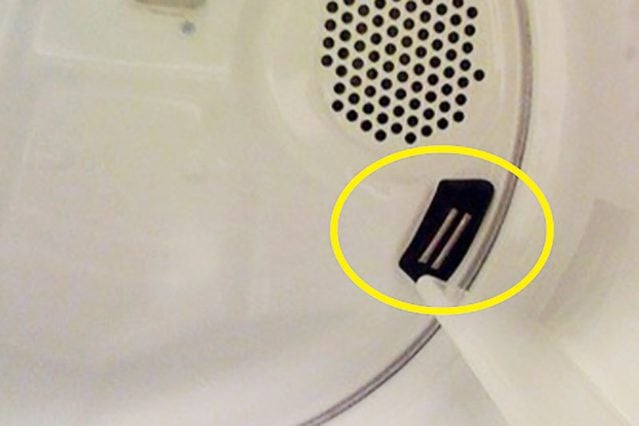
The sensor itself typically consists of two parallel stainless steel strips. These bars are usually mounted inside the dryer drum cavity, right below the lint filter housing on the front bulkhead, or occasionally on the back wall.
The system works using electrical conductivity:
- When clothes are wet: The moisture in the damp fabrics touches both metal strips simultaneously, completing a low-voltage electrical circuit. The sensor tells the main board, “Hey, water is present, keep the flame or heating element burning.”
- As clothes dry out: The fabrics lose their moisture, meaning they can no longer conduct electricity across the two metal bars. Once the circuit remains broken for a specific period, the dryer knows the load is done and safely shuts down the cycle.
The problem arises when an invisible chemical film coats those metallic bars. When this happens, the damp clothes touch the metal, but the moisture can’t break through the chemical glaze. The machine assumes the load is already bone-dry and cuts off after just ten or fifteen minutes.
The Enemies of Auto Dry: What is Coating Your Sensor?
You might think your clothes are clean when they enter the dryer, but they carry a hidden chemical payload. Let us look at a troubleshooting matrix of the primary culprits that degrade your sensor performance.
| Culprit Material | How It Formulates | Impact on Auto Dry Cycle | Prevention Level |
| Liquid Fabric Softener | Residual chemical coating left behind on fabrics during the wash cycle. | Creates a thick, waxy, non-conductive layer over the metal strips. | High (Switch to natural alternatives) |
| Dryer Sheets | Softener chemicals melt off the sheet under high heat inside the drum. | Coats the entire drum interior and blinds the sensor surface directly. | High (Use wool dryer balls instead) |
| Hard Water Minerals | Calcium and magnesium deposits from the household water supply. | Forms a crusty white scale over the metal bars that blocks conductivity. | Medium (Requires periodic acid cleaning) |
| Excess Detergent Scum | Unrinsed soap residue that migrates from the washing machine. | Leaves a dull, cloudy film that mimics a dry state to the machine board. | High (Reduce soap dosing measurements) |
If you use dryer sheets or liquid fabric softeners with every single load, your sensor is almost guaranteed to have a heavy glaze on it right now. By utilizing our maintenance breakdowns on FixNest.xyz, you can easily reverse this buildup and restore your appliance back to its factory efficiency.
Step-by-Step Guide to Cleaning and Maintaining Your Dryer Sensor
Let us walk through the simple cleaning proccess to get those metal bars gleaming and conductive again. You do not need any mechanical training for this, just a few minutes of your afternoon.
Step 1: Disconnect the Electrical Power
Safety first, without exception. Before you stick your hands or any liquids inside the mechanical drum of your appliance, unplug the dryer from the wall box. If your dryer plug is buried behind a heavy laundry stack, locate your main home breaker panel and flip the breaker switch labeled for the laundry room. Your going to be wiping down interior components, so cutting the power is a necessary precaution to protect yourself.
Step 2: Locate the Moisture Sensor Strips
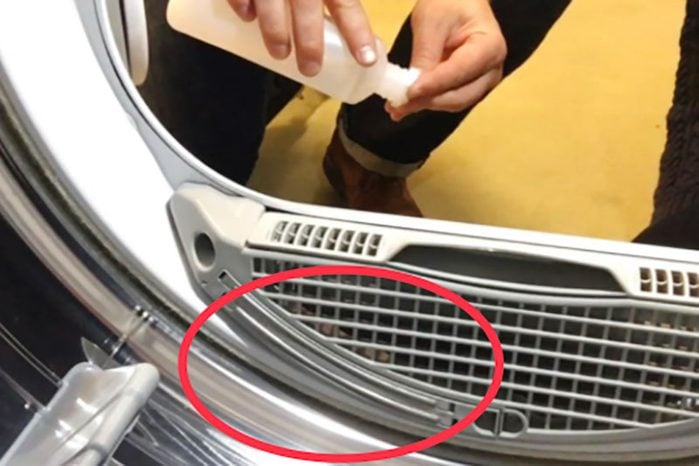
Open your dryer door completely and grab a flashlight. Look inside the drum, right around the front interior housing wall, usually directly attached to the plastic grill assembly that holds your lint filter screen.
You are looking for two curved, silver-colored metal strips that are roughly two to three inches long. They are usually embedded in a small plastic block. If you see a dull, cloudy, or slightly yellowed film over them, you have found the root cause of your auto dry failures.
Step 3: Dissolve the Waxy Chemical Film
Do not use harsh commercial spray cleaners, metal polishes, or WD-40 inside your dryer drum; these chemicals can leave flammable residues or permanently stain your next load of light clothes.
Instead, take a clean microfiber cloth and dip it into standard household rubbing alcohol (isopropyl alcohol). Rub the damp cloth firmly along the length of both metal strips. You will likely see a dark, grayish residue transfer onto your cloth—that is the melted wax layer from your dryer sheets coming off.
Step 4: Deal with Stubborn Hard Water Scale
If you live in an area with high hard water content, rubbing alcohol might not dissolve the calcified mineral crust fully.
If the strips still look cloudy or have a white, chalky texture around the edges, dip an old toothbrush into distilled white vinegar. Scrub the metal bars vigorously with the toothbrush. The mild acetic acid in the vinegar will safely dissolve the mineral bonds without harming the surrounding plastic mounting block.
Step 5: The Gentle Scuffing Secret (For Severe Cases)
If your auto dry setting has been malfunctioning for over a year, the buildup might be baked on like concrete.
Take a very fine piece of fine-grit sandpaper or a kitchen scouring pad (the soft green type, never steel wool). Give the metal bars a very light, gentle scuffing. Do not press hard—you do not want to gouge or scratch the stainless steel. You just want to physically break the surface tension of the chemical glaze until you see bright, reflective metal shining through.
Step 6: Final Wipe and Dry
Take a clean cloth dipped in plain warm water and wipe down the sensor area one final time to remove any loosened debris, loose grit, or leftover vinegar. Use a dry towel to wipe the bars completely dry.
Step 7: Clean the Lint Filter Screen (The Bonus Airflow Step)
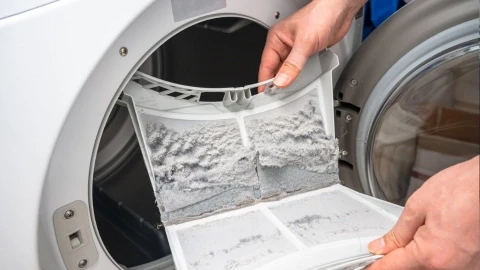
While you are working inside the front housing, pull out your main lint filter screen. Even if you clean the lint out after every load, fabric softeners form an invisible film over the fine mesh screen too, restricting airflow and causing the dryer to run too hot.
Take the screen to your kitchen sink, spray it with dish soap, and scrub it with a brush under warm running water. If the water pools on top of the mesh instead of flowing straight through it, it was blocked by invisible wax. Once clean, dry it thoroughly and slide it back into place.
Step 8: Power Up and Test
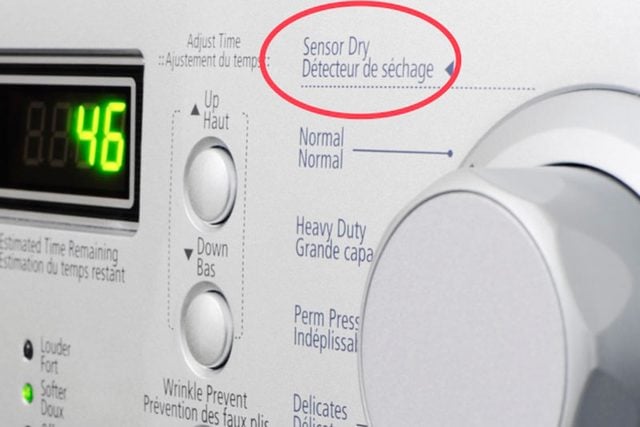
Plug your dryer back into the wall outlet or flip the electrical breaker back on. Throw in a small load of damp towels or shirts, select your “Auto Dry” or “Sensor Dry” setting, and hit start. The machine should now track the moisture level perfectly, running until the fabrics are just right and stopping automatically to protect your clothes.
Smart Laundry Habits to Protect Your Sensor Long-Term
Now that you know how to keep your dryer sensor working properly for auto dry cycles, your goal should be to stop that sticky film from building up again. Altering a few simple choices in your laundry routing will save your sensor and cut your energy bills.
- Ditch Chemical Dryer Sheets: Dryer sheets operate by coating your fabrics in a thin layer of chemical fat to reduce static electricity. That fat melts off inside the hot drum and glazes your sensor. Switch to high-quality wool dryer balls instead. They naturally separate clothes to speed up drying times and reduce static without leaving any chemical residue behind.
- Run a Monthly Internal Wipe-Down: Make it a habit to wipe down those two metal strips with rubbing alcohol once every month. It takes less than sixty seconds and guarantees your auto dry feature never loses its accuracy.
- Separate Fabric Weights: The sensor can only read what touches it. If you mix heavy cotton towels with thin synthetic athletic shirts in the same load, the thin shirts will dry quickly, hit the sensor, and trigger the machine to shut down—leaving your heavy towels completely damp. Group similar fabric weights together for the best results.
Recommended Laundry Appliance Care Timeline
To avoid sudden appliance failures and ensure your machines operate at maximum thermal efficiency, stick to this simple technician-approved checklist:
[Every Load]      -> [Clean the primary lint filter screen tray]
       |
[Once a Month]    -> [Wipe the moisture sensor bars with rubbing alcohol]
       |
[Every 6 Months]  -> [Wash the primary mesh lint screen with soapy water]
       |
[Once a Year]     -> [Complete a full brush clean of the main wall vent line]
By maintaining this simple schedule, you will drastically extend the lifespan of your dryer’s internal heating element and thermal safety fuses while keeping your household utility budget completely under control.
Your Home for Smart DIY Savings
Keeping your household appliances in peak operating condition doesn’t have to mean pouring cash down the drain for professional trade service visits. With a little bit of guidance and the right approach, you can confidently manage these everyday maintenance tasks on your own schedule.
If you found this auto dry troubleshooting blueprint clear and valuable, make sure to bookmark FixNest.xyz so you always have a trusted technician manual ready for your next household repair project. Don’t forget to subscribe to our monthly newsletter below to receive timely maintanence checklists and practical appliance tips delivered straight to your email inbox.
Did you run into a problem trying to find the sensor strips on your specific brand of dryer? Or maybe your machine is still over-drying even after a deep sensor clean? Leave a comment down below right now! I read through our community comments regularly and will help you figure out exactly how to get your laundry setup running perfectly again. Let us get those cycles running efficiently!