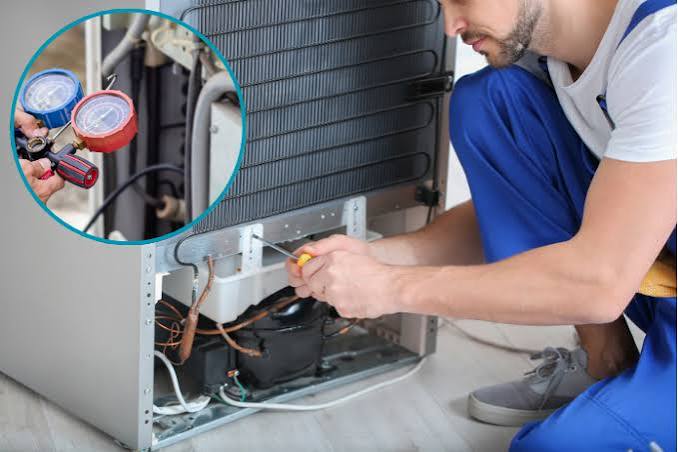
Is your fridge clicking but not staying cold? Learn how to troubleshoot and fix this common appliance issue yourself with our expert guide.
How to Fix a Refrigerator That Keeps Clicking and Not Cooling
You walk into the kitchen at midnight for a glass of water, and you hear it. A distinct, rhythmic click, followed by a low hum that abruptly cuts out, and then dead silence. Intrigued, you open the fridge door only to find your milk is lukewarm and the ice cream is turning into soup.
Look, I get it, appliance maintenance is boring but dealing with a broken fridge is a stressful, expensive nightmare you want to avoid. When you have a refrigerator that keeps clicking and not cooling, your appliance is essentially crying out for help.
As a senior technician, I see this exact issue week in and week out. The good news? You don’t need to panic, and you probably don’t need to drop $1,500 on a new appliance just yet. At FixNest.xyz, we are dedicated to helping homeowners and renters take control of their household repairs, saving you a fortune on professional service fees. Let’s dive into exactly what that clicking sound means and how you can fix it yourself safely.
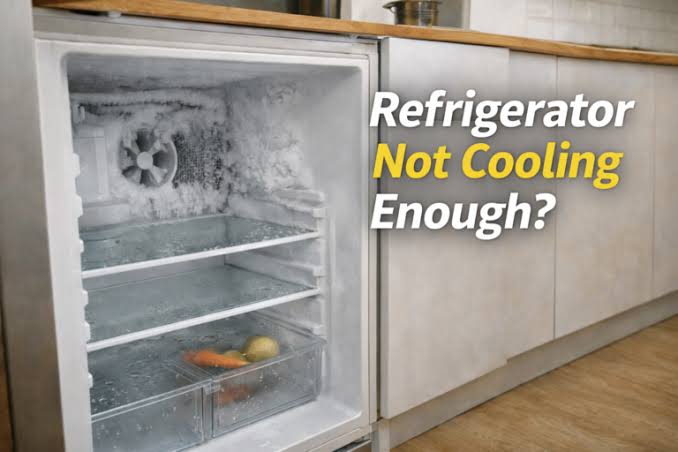
Anatomy of the “Click”: What is Actually Happening?
Before we pull out the tools, let’s talk about what that clicking sound actually is. Your refrigerator relies on a compressor to pump refrigerant through the system and keep things cold. The compressor requires a massive jolt of electricity to start up.
When your refrigerator keeps clicking and not cooling, you are hearing the start relay (or overload protector) trying to kickstart the compressor. It sends power, the compressor fails to start, the relay overheats, and the overload protector cuts the power to prevent an electrical fire. That second click is the system shutting itself down. A few minutes later, once it cools down, it tries again.
Here is the real talk: continuing to let your fridge click over and over without fixing it can permanently destroy your compressor. And if the compressor dies, your fridge is usually toast.
The Troubleshooting Matrix
To make your life easier, I’ve broken down the most common culprits behind this issue, their difficulty level, and what it will cost you to fix them yourself versus hiring a pro.
| Suspected Component | Primary Symptom | DIY Difficulty | Estimated Part Cost | Pro Repair Cost |
| Dirty Condenser Coils | Constant running, clicking, warm interior | Very Easy | $0 (Just cleaning) | $100 – $200 |
| Start Relay / Capacitor | Loud clicking every 2–5 minutes, compressor warm but silent | Easy | $15 – $40 | $200 – $350 |
| Condenser Fan Motor | Clicking, fridge warm, fan not spinning or making scraping noise | Moderate | $30 – $70 | $250 – $400 |
| Failed Compressor | Clicking, compressor burning hot to the touch, total cooling failure | Professional Only | $300+ | $600 – $1,000 |
Step 1: The Zero-Dollar Fix (Clean Your Condenser Coils)
Before you buy any replacement parts, we need to rule out the simplest, most overlooked part of refrigerator maintanence: dirty coils.
If your condenser coils are caked in dust, pet hair, and lint, the fridge cannot dissipate heat. This causes the compressor to overheat rapidly, triggering the overload switch (the click) to shut it down.
How to Clean the Coils Safely
- Unplug the refrigerator. Never work on a live appliance.
- Locate the coils. Depending on your model, these are either behind a bottom toe-grill on the front or behind an access panel on the back of the fridge.
- Vacuum the debris. Use a vacuum cleaner brush attachment or a specialized coil brush to gently pull away the dust buildup.
- Clean the fan. While you are back there, check the condenser fan. Spin it with your hand to make sure it moves freely. If it’s stuck or gummed up with pet hair, clean it out.
- Plug it back in. Give it an hour. If the clicking stops and your fridge starts cooling, congrats! You just saved yourself a few hundred bucks by practicing basic maintenance.
Step 2: Testing and Replacing the Start Relay
If your coils are clean but your refrigerator keeps clicking and not cooling, your next stop is the start relay. This is a small plastic device plugged directly into the side of the compressor. It is the single most common failure point for this specific symptom.
Safety Warning: Always ensure your refrigerator is completely disconnected from the power source before removing any electrical panels or handling components.
Tool Checklist
- A Phillips head screwdriver
- A flathead screwdriver
- A multi-meter (optional, but highly recommended)
- A replacement start relay (make sure it matches your fridge model number)
Detailed Step-by-Step Replacement Guide
1. Access the Compressor Compartment
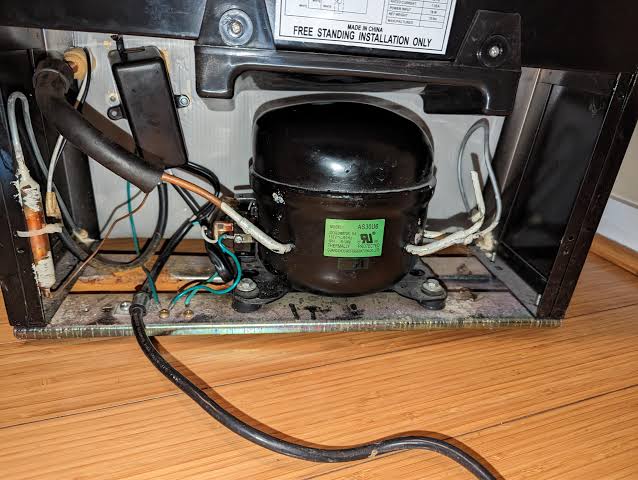
Pull the refrigerator away from the wall so you have plenty of room to work. Remove the lower rear access panel. This is usually held in place by a few hex head screws or Phillips screws. Once the panel is off, you will see a large, black, dome-shaped tank. That is your compressor.
2. Locate and Remove the Start Relay
On the side of the compressor, you will see a small plastic housing cover. Pop this cover off using your flathead screwdriver. Underneath, you’ll find the start relay plugged directly onto three metal prongs protruding from the compressor. Gently pull the relay straight off the prongs. Disconnect the wire harness attached to it.
3. The “Rattle” Test
This is an old technician trick that works surprisingly well. Take the start relay and shake it next to your ear. Do you hear a distinct rattling sound, like a broken lightbulb? If your answer is yes, the solid-state ceramic disk inside the relay has shattered. The part is completely dead and needs to be replaced.
4. Test with a Multimeter (For Absolute Certainty)
If you want to be 100% sure before buying a part, set your multimeter to the Ohms ($\Omega$) setting. Place the probes into the two main terminal holes of the relay. A good relay will read somewhere between 3 and 12 Ohms. If your multimeter reads “OL” (Open Line) or zero, the relay has failed.
5. Install the New Component
Grab your replacement start relay. Plug the wire harness back into the new part exactly how it came off the old one. Align the holes on the relay with the metal prongs on the side of the compressor and press it firmly into place. Reattach the plastic protective cover.
6. Power Up and Test
Reinstall the rear access panel and plug the refrigerator back into the wall outlet. Listen closely. You should hear a smooth, consistent hum as the compressor kicks over. Check back in an hour to confirm that your freezer and fresh food compartments are dropping in temperature.
Step 3: Assessing the Run Capacitor
Some refrigerator models use a run capacitor attached directly to the start relay to provide extra electrical efficiency while the compressor runs. If your capacitor fails, your compressor might struggle to start, leading to that same repetitive clicking sound.
Look for a small cylinder or box-shaped part attached to your relay. If the sides of the capacitor are bulging, leaking fluid, or showing scorch marks, it is blown. Replacing it is as simple as unplugging the old wires and sliding the new one into place.
When is it Time to Call a Professional?
We love a good DIY project here at FixNest.xyz, but part of being a smart homeowner is knowing your limits. If you have cleaned the coils, replaced the start relay, and your refrigerator keeps clicking and not cooling, you are likely dealing with a mechanically locked compressor.
When the internal pistons of a compressor seize up, the unit will draw excessive amperage, overheat instantly, and trip the relay. Replacing a compressor requires cutting into the refrigerant lines, brazing copper pipes, and handling controlled refrigerants. This requires EPA certification and specialized, expensive gear. If you reach this point, it is time to call in a trusted local technician or evaluate if it’s more cost-effective to replace the appliance entirely.
Keeping Your Kitchen Running Smoothly
Appliances don’t last forever, but with the right troubleshooting steps, you can significantly extend their lifespan. Don’t let a sudden breakdown force you into making an emergency purchase you aren’t financially ready for.
If you managed to get your fridge up and running today, don’t stop here! Make sure to bookmark FixNest.xyz so you always know where to turn when your dishwasher leaks, your dryer won’t heat, or your oven acts up. Drop a comment below if you ran into any issues during your repair, or subscribe to our newsletter to receive easy monthly appliance maintenance checklists straight to your inbox. Let’s keep your home running perfectly without breaking the bank.