Learn how to clean a ductless mini split air filter safely at home. Lower your power bills, improve cooling, and save money on HVAC repair calls.
How to Clean a Ductless Mini Split Air Filter Safely
Look, I get it, appliance maintenance is boring but neglecting your ductless mini split is a surefire way to run your electricity bill through the roof and shorten your system’s lifespan. Mini splits are incredibly efficient, quiet, and popular climate systems. However, because the indoor high-wall air handler sits directly inside your living room or bedroom, it constantly recirculates ambient indoor air. This means it catches a heavy load of fine dust, pet dander, and cooking grease.
Here is the real talk: calling an HVAC technician out to clean a basic dust screen is a massive waste of your cash. This is a task you can easily tackle yourself in less than thirty minutes without using any specialized tools.
At FixNest.xyz, our primary goal is to empower homeowners and renters with safe, budget-friendly DIY strategies so you can manage your household gear without relying on expensive professional repairs. Learning how to clean a ductless mini split air filter safely is one of the easiest ways to ensure crisp, clean airflow, eliminate foul odors, and maximize your energy savings. In this complete guide, we will cover how a clogged filter impacts your indoor comfort, what tools you need, and a complete step-by-step tutorial.
The Cost of Choked Airflow in a Mini Split System
Unlike a massive ducted furnace or central air conditioner, a ductless mini split features a very compact indoor chassis. It relies on a specialized cylinder-style fan—known as a cross-flow blower wheel—to pull air across a small, highly dense network of aluminum evaporator coils.
When your mesh pre-filters get covered in a velvety blanket of dust, the consequences strike quickly:
Restricted Cooling and Heating: Your system will feel like it is barely blowing any air, even when the fan is set to high.
Frozen Coils and Water Leaks: Without proper room air passing over the cold coils, their temperature drops below freezing. Ice will form across the metal face, block all airflow, and eventually melt down into a massive water leak behind your wall paneling.
Blower Wheel Strain: Your internal fan motor has to run at maximum effort to pull air through a choked filter. This drastically accelerates wear and tear, leading to premature motor failures that are expensive to fix.
By keeping these filters clean, your letting your system breathe freely, which keeps your monthly utility bills down and prevents emergency service calls.
Understanding Mini Split Filter Maintenance Schedules
Most high-wall indoor mini splits (whether you own a Daikin, Mitsubishi, Gree, or Pioneer unit) contain two main types of filtration elements behind the front plastic cover plate.
Mini Split Filter Components Guide
Filter Category
Core Material
Is It Washable?
Maintenance Strategy
Recommended Frequency
Primary Pre-Filter
High-density nylon or plastic mesh matrix.
Yes
Vacuum off loose dust, wash in warm water with a mild detergent.
Every 2 to 4 weeks during heavy operational seasons.
Enzyme / Allergen Insert
Specialized blue or green pleated fibrous material.
No
Gently vacuum on low suction or replace. Water destroys the special coating.
Inspect monthly; replace every 3 to 6 months.
Deodorizing / Carbon Strip
Black porous ceramic or carbon fiber insert.
Varies
Some can be rinsed and reactivated in sunlight; others must be replaced.
Check manufacturer manual; replace or regenerate every 6 months.
Technician’s Warning: Never run your mini split system without the primary mesh filters installed, even for a single afternoon. Bypassing the filters allows raw household dust to land directly on the wet evaporator coils and stick inside the spinning blower wheel. Cleaning a dirty blower wheel requires a complex tear-down proccess that usually requires an expensive technician visit.
Tools and Supplies Needed for a Safe Clean
You likely already have everything you need to execute this clean safely right inside your utility closet:
A sturdy step stool or A-frame ladder
A vacuum cleaner with a soft brush attachment
A clean microfiber towel
Mild liquid dish soap
A shallow basin, bathtub, or sink
Step-by-Step Guide: How to Clean a Ductless Mini Split Air Filter Safely
Grab your step stool and follow these instructions systematically to clean your filters safely without cracking any plastic housings or components.
Step 1: Shut Off the Electrical Power Complete
Safety is always our absolute priority here at FixNest.xyz. Before you open up any electrical appliance, you must eliminate the risk of electric shock or sudden fan activation. Use your remote control to power down the indoor unit and wait for the louvers to close completely. Next, find the dedicated electrical switch or outdoor breaker box connected to your mini split system and flip it to the OFF position.
Step 2: Open the Front Panel Cover
Position your ladder safely beneath the high-wall unit. Look along the lower left and right sides of the indoor unit’s front plastic faceplate. You will find two small recessed thumb indents. Place your fingers in these grooves and gently lift the panel upward. The front cover will swing upward on a top hinge. Most modern units feature a built-in kickstand latch that clicks into place, holding the heavy plastic hood open so you can work with both hands free.
Step 3: Extract the Mesh Pre-Filters Carefully
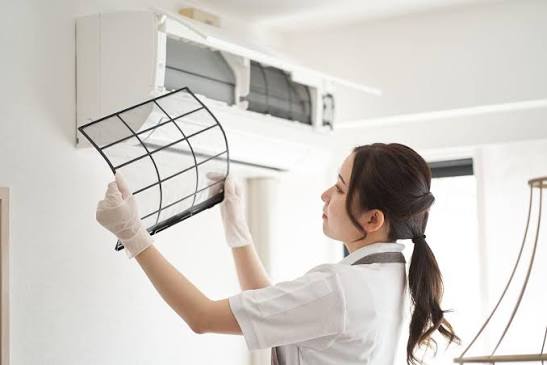
With the hood propped open, you will see the dual curved nylon mesh filters resting inside their tracks directly over the shiny metal coils. Locate the small plastic finger tabs at the bottom edge of each filter frame. Push the tab upward slightly to unhook it from the plastic retaining clips, then smoothly pull the filter downward and out toward you. Work gently; if the filters are heavily coated in loose dust, pulling them out aggressively can shake a cloud of debris directly onto your bedding or floor.
Step 4: Disengage Any Secondary Specialty Filters
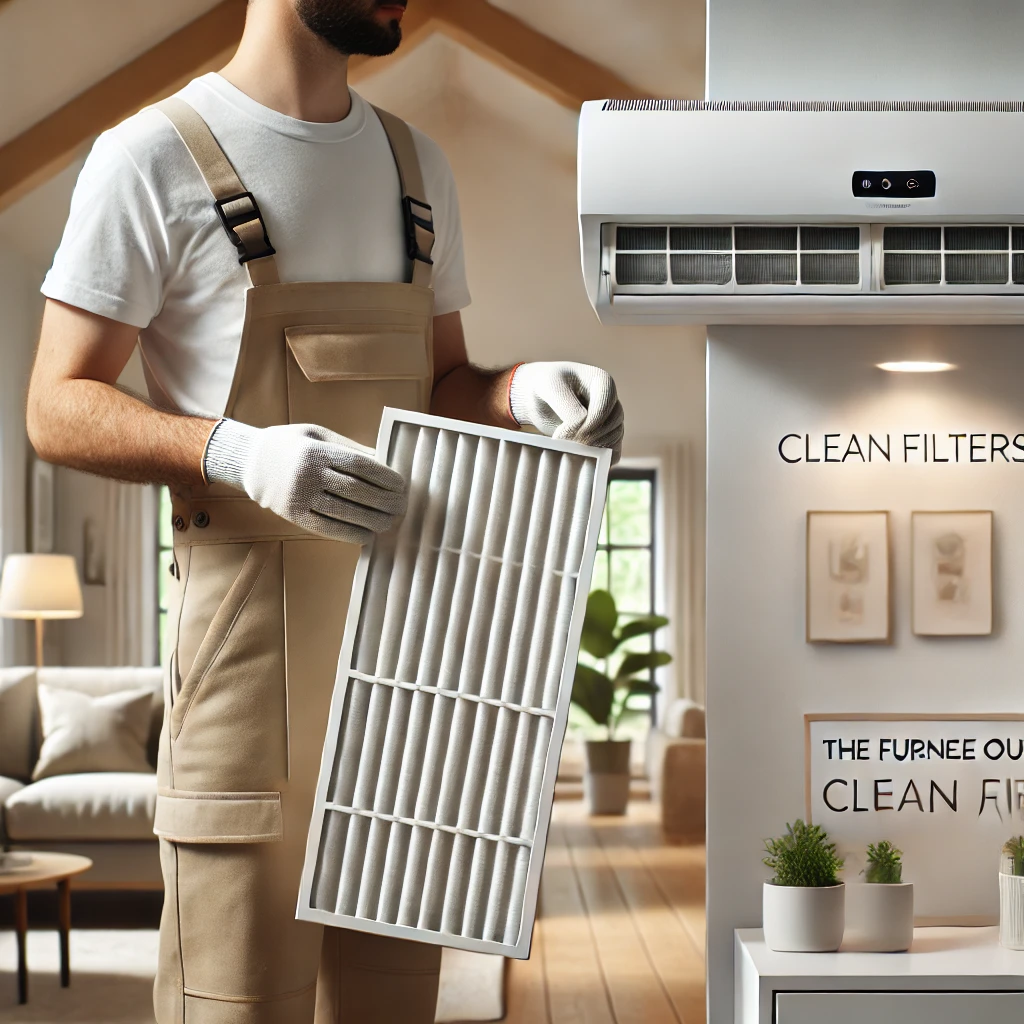
Take a close look at the mesh frames you just removed. Many manufacturers place smaller, colorful plastic clips containing blue, green, or black enzyme strips directly onto the back of the large mesh screens. If your unit utilizes these secondary filters, unclip them carefully now and set them aside. If they are heavily soiled, refer to the manufacturer specs for replacement, or vacuum them very lightly on low power. Do not get them wet!
Step 5: Vacuum and Wash the Mesh Screens
Take your primary nylon mesh screens to a well-ventilated area or sink. Use your vacuum’s soft brush attachment to lift away the thick layers of loose lint and pet fur from the front face of the filter. Next, fill your sink or a washbasin with lukewarm water and mix in a few drops of mild liquid dish soap. Submerge the mesh screens and let them soak for five to ten minutes to dissolve any sticky oils or smoke residues. Rinse them under a gentle stream of running tap water, ensuring the water flows from the back side of the filter through to the front to wash the dust outward.
Step 6: Let the Filters Dry 100%
Shake the clean screens gently over your sink to shed excess water droplets, then lay them flat on a clean microfiber towel in a well-ventilated room. You must allow the filters to air dry completely before reinstalling them. Placing a damp filter back into a high-wall unit creates an instant breeding ground for black mold, mildew, and foul bacteria that will pollute your indoor air quality. Avoid using hot hair dryers or leaving them out in direct scorching sunlight, as extreme heat can warp or shrink the thin plastic frames, preventing them from sliding back into your unit’s tight tracks.
Step 7: Reinstall and Re-Power Your System
Once your mesh screens are bone dry, clip your secondary specialty filters back into place on the main frames. Slide the top edge of each mesh filter back up into its upper guide rails inside the indoor unit, pushing it up until the lower edge clicks securely under the bottom retaining clips. Release the front hood kickstand latch and lower the main face panel back down, pressing firmly on both lower corners until you hear a solid click. Restore your electrical breaker power, grab your remote, and turn your system back on.
Troubleshooting Mini Split Issues Post-Cleaning
If you cleaned your filters but your system is still refusing to heat or cool properly, look at this quick diagnostic reference chart to identify what might be going wrong.
Mini Split Troubleshooting Matrix
What You Notice
Potential Root Cause
Corrective Action Plan
The unit runs, but the air smells intensely musty or sour.
Mold or mildew has colonised the deep interior plastic drain pan or the blower wheel.
Professional Care Required: The filters are clean, but your system needs a deep chemical flush of the indoor coil and blower wheel assembly using a specialized wash bag.
The “Filter” or “Clean” light is still blinking on the display.
The internal maintenance timer requires a manual reset.
The system doesn’t actually test if the filter is clean; it operates on a basic hours-run timer. Grab your remote and press the “Clean Filter” or “Reset” button to clear the warning light.
Water is dripping from the bottom of the indoor wall unit.
The narrow condensate drain line is clogged with algae slime, causing the drain pan to overflow.
DIY: Locate where the flexible drain line exits your house outside. Use a wet/dry shop vacuum to clear the blockage out from the exterior end of the pipe.
The system turns on, but your remote won’t change the settings.
The remote batteries are weak, or you’re experiencing a system lockup.
Replace the remote batteries with fresh alkalines. If it remains frozen, turn off the system power breaker for 60 seconds to force a hard reboot of the internal control board.
Simple Daily Habits for Long-Term Mini Split Health
Consistency is the secret sauce when it comes to keeping your high-wall units operating at peak performance for decades. Get into the habit of checking your indoor filters once every two to three weeks during the peak summer and winter months when your system runs around the clock. If you share your home with multiple shedding pets or cook heavily with oil, you may need to rinse them out even more frequently.
Additionally, pay attention to how you shut off your system. If your mini split features a “Dry Mode” or an “X-Fan” setting, use it! This setting keeps the indoor fan spinning at a low speed for ten minutes after you turn off the cooling mode, drying out any remaining condensation on the aluminum coils and preventing mold spores from taking root inside your clean machine.
Wrap Up and Next Steps
Taking care of your ductless mini split doesn’t require an advanced HVAC certification or an expensive maintenance contract. By dedicating just twenty minutes a month to safely opening your front panel and washing your mesh screens, you guarantee a comfortable home, maximize your energy efficiency, and protect your family’s respiratory health.
Whenever you find yourself scratching your head over a cranky household appliance, remember that FixNest.xyz is your go-to resource for homeowners looking to extend the lifespan of their appliances and save money on repairs. We skip the confusing technical jargon and deliver direct, honest advice you can use immediately.
If you love saving money and want to stay on top of your home’s upkeep, subscribe to our newsletter for practical monthly appliance maintenance reminders sent straight to your inbox. Did you run into a weird issue while trying to open your unit’s front cover, or is your mini split still refusing to blow cold air after a thorough cleaning? Leave a comment down below with your unit’s model number, and our community will help you figure it out!