Discover why your dishwasher is leaking water from the bottom door. Read our pro guide to diagnose the cause and fix it yourself safely.
Why Is My Dishwasher Leaking Water From the Bottom Door
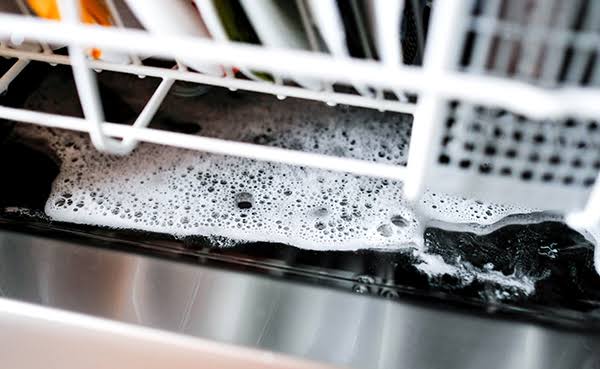
You just finished a heavy dinner, loaded up the racks, pressed start, and sat down to relax. A half-hour later, you step back into the kitchen only to feel a cold, squishy puddle under your bare feet. You look down, and sure enough, soapy suds are actively escaping right from the base of your machine.
Look, I get it, appliance maintenance is boring but discovering a kitchen floor covered in water is enough to ruin anyone’s evening. When you find yourself asking, “why is my dishwasher leaking water from the bottom door,” your mind immediately jumps to expensive hardwood floor damage and astronomical plumber bills.
As a senior technician who has spent decades working on these machines, I have some reassuring news: a leak at the bottom of the door rarely means you need a whole new dishwasher. In fact, it is usually a simple fix you can knock out yourself over the weekend. At FixNest.xyz, our mission is to break down these stressful household breakdowns into clear, affordable DIY projects. Let’s figure out exactly why your machine is acting like a water fountain and get it sealed up properly.
The Troubleshooting Matrix: Finding the Leak Source
Water follows the path of least resistance, which means a leak at the bottom door area can actually originate from a few different components inside the tub. Use this diagnostic table to narrow down your specific issue based on what you are seeing.
| Primary Culprit | Where to Look | How it Causes the Leak | Repair Difficulty |
| Damaged Bottom Door Seal | Very bottom lip of the inner door panel | Rubber degrades, tears, or gets jammed with debris | Easy to Moderate |
| Split Lower Spray Arm | Spinning plastic arm at the very bottom of the tub | Seam splits and shoots a high-pressure jet directly at the door seams | Easy |
| Stuck Float Switch | Small plastic cylinder on the tub floor | Fails to shut off the water inlet valve, leading to overfilling | Easy |
| Wrong Dishwasher Detergent | Floating suds inside the tub | Regular dish soap creates a mountain of foam that spills over the tub barrier | Super Easy |
The Surprise Culprit: The Lower Spray Arm
Before we blame the rubber gaskets, I want to share a trade secret. A massive percentage of service calls for a dishwasher leaking water from the bottom door are solved without replacing a single gasket. The real troublemaker is often a cracked lower spray arm.
Your dishwasher door isn’t designed to be completely watertight like a submarine hatch. Instead, it relies on a system of baffles and deflectors to block splashing water. The bottom of the door usually doesn’t have a tight, pressurized rubber seal; it simply overlaps an inner tub lip.
If the plastic seam on your lower spray arm splits apart—as shown in the example image above—it stops spraying water upward at your dishes. Instead, it acts like a miniature pressure washer, shooting a flat, concentrated stream of water horizontally. This high-pressure jet blasts right under the door deflector, overpowering the lower barrier and creating a steady puddle on your kitchen floor.
Step-by-Step Guide: How to Safely Diagnose and Fix the Leak
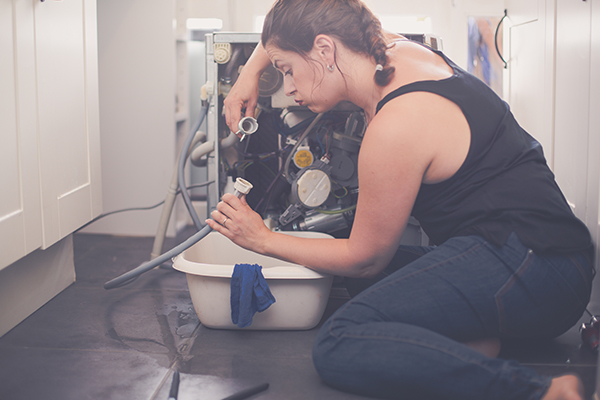
Now that you know what you are looking for, let’s go through the inspection proccess methodically. Work through these steps in order to isolate and resolve the issue without throwing away money on unneeded parts.
Step 1: Rule Out the “Suds” Factor
Here is the real talk: did someone accidentally squirt regular liquid dish soap into the dispenser because you ran out of dishwasher pods? It happens more often than you think. Regular soap creates massive amounts of foam that fill the entire cabinet. The lightweight suds push past the lower door baffles and condense into a watery mess on your floor.
- The Fix: If you see a wall of foam inside, scoop it out. Run a rinse cycle with a tablespoon of vegetable oil or a splash of white vinegar to break down the remaining bubbles.
Step 2: Inspect and Clean the Main Door Gasket
Open your dishwasher door completely and look at the black or gray rubber gasket running along the left, top, and right sides of the tub opening.
- Run your fingers along the entire channel. Do you feel food particles, dog hair, or hardened detergent chunks? Build-up prevents the door from closing flush.
- Look closely at the very bottom corners where the gasket ends. If your gasket has pulled out of its tracks or shifted downward, it leaves an open pathway for water.
- Clean the entire rubber track with warm soapy water and a soft microfiber cloth. If you notice deep tears or chunks missing, you’re going to need to replace the tub gasket.
Step 3: Check the Lower Door Seal (The Splash Guard)
If the main side gasket looks flawless, the issue is likely at the absolute bottom of the door. Most modern dishwashers feature a separate rubber or plastic strip attached to the bottom edge of the inner door panel.
- To get a good look at this, you may need to open the door halfway or unbolt the outer cosmetic door panel (usually held by a series of Torx screws along the inner perimeter).
- Inspect this bottom flap for signs of rotting, wavy warping, or tearing. Because it sits in the sludgiest part of the machine, it is prone to grease buildup that slowly eats away at the material over time.
Step 4: Examine the Lower Spray Arm for Cracks
Remove the bottom dish rack and pull the lower spray arm upward. On most models, it unscrews by turning the center cap counterclockwise, or it simply snaps off with a gentle tug.
- Inspect the tiny holes where water is supposed to exit. Are they clogged with hard water mineral scale or tiny seeds? Wipe them clean with a toothpick.
- Flip the arm over and look closely at the plastic weld seam where the top and bottom halves of the arm melt together. If you see even a tiny gap or a hair-line crack along that edge, water will shoot sideways, straight into the bottom door gap. Replace the arm immediately if you spot a split.
Step 5: Test the Float Switch Functionality
Look at the bottom floor of your dishwasher tub. You will see a small plastic dome or cylinder. This is your float switch. As water fills the tub, this float rises. When it reaches the correct level, it trips a tiny microswitch underneath to turn off the water supply.
- Reach down and lift the float up and down. You should hear a distinct, crisp click every time you lift it.
- If the float is stuck in the down position due to a stray fork or a layer of grease, the machine will keep filling until the water level climbs past the bottom lip of the door opening, causing an immediate flood. Clean around the base of the float to ensure it moves completely free.
Preventative Maintenance: Keeping Your Floors Dry
No one wants to deal with water cleanup on a regular basis. To avoid future leaks and maximize the lifespan of your kitchen appliances, add these simple tasks to your monthly home maintenance schedule.
- Run a Monthly Deep Clean: Toss a cup of white vinegar into an empty dishwasher and run a hot cycle. This dissolves hard water scale and grease deposits before they can rot out your rubber door seals.
- Clear the Drain Filter: A partially clogged drain basket causes water to back up in the tub faster than the pump can remove it. Twist out the cylindrical filter at the bottom of the tub every few weeks and rinse it under running water.
- Don’t Overload the Racks: If a large baking sheet or a stray spatula blocks the spray arms from spinning, it can trap an arm in a position where it continually sprays water directly toward the door seam, forcing water past the lower barrier.
When to Call in a Professional
At FixNest.xyz, we want to give you the confidence to handle your own repairs. However, if you have checked the spray arms, cleared the float switch, installed a new bottom seal, and water is still pouring out, you might be dealing with a cracked plastic inner tub or a faulty water inlet valve that refuses to shut off even when the machine is completely powered down. If you suspect an electrical failure or see water leaking from underneath the machine rather than the door edge, it is time to turn off the water shut-off valve and get a professional technician involved.
Join the FixNest Community
Tackling your own appliance maintenance doesn’t just save you money on service bills—it gives you total control over your living space. If this guide helped you conquer your leaking dishwasher today, make sure to bookmark FixNest.xyz so you have an expert resource ready for your next household project.
Have a question about a tricky door gasket, or did you hit an unexpected roadblock while taking apart your machine? Drop a comment below! We read every single note. And don’t forget to subscribe to our newsletter for practical, monthly appliance maintenance reminders delivered straight to your inbox. Let’s keep your home running smoothly, one DIY fix at a time.