Learn the critical signs your clothes dryer is overheating and poses a fire hazard, plus easy DIY steps to fix it and keep your home safe.
Is Your Dryer a Ticking Time Bomb? 5 Signs Your Clothes Dryer Is Overheating and Poses a Fire Hazard
Look, I get it. Appliance maintenance is boring. When you finish a long day of work, the last thing you want to do is spend your evening inspecting your laundry room. You just want to throw your wet clothes into the drum, press start, and walk away.
But here is the real talk from someone who has spent over fifteen years repairing major home appliances: your clothes dryer is quietly one of the most dangerous machines in your house if you neglect it.
According to the National Fire Protection Association (NFPA), clothes dryers are responsible for thousands of structural fires every single year, causing millions of dollars in property damage and entirely preventable injuries. The leading cause of these fires? A failure to clean them, leading to extreme overheating.
At FixNest.xyz, our mission is to help you maintain, troubleshoot, and fix your household appliances without spending a fortune on professional service calls. Today, we are going to dive deep into the unmistakable signs your clothes dryer is overheating and poses a fire hazard, why it happens, and exactly how you can fix it yourself safely.
Why Do Clothes Dryers Overheat?
Before we look at the warning signs, we need to understand the physics of a dryer. Your dryer works through a delicate balance of three elements: heat, airflow, and tumbling.
When your dryer is running efficiently, a heating element (gas or electric) warms the air, a fan blows that air through the tumbling clothes, and the moist air is evacuated out of your home through an exhaust vent.
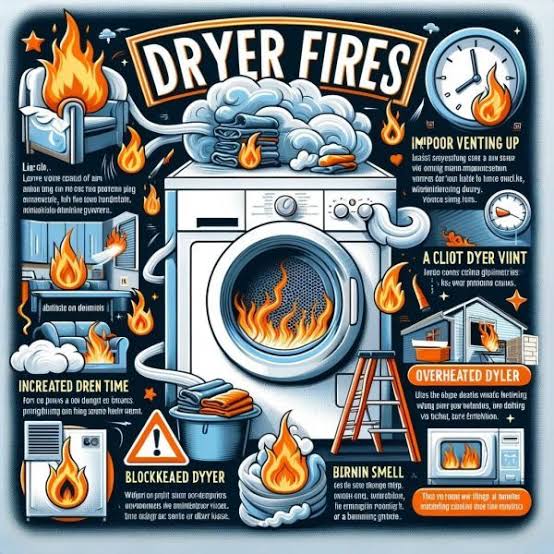
If the airflow is restricted by lint buildup, crushed ductwork, or a failing component, that intense heat has nowhere to go. It traps itself inside the drum and the internal chassis. When temperatures exceed safe limits, the highly flammable lint inside the machine can ignite in seconds.
Red Flag Warning Signs Your Clothes Dryer Is Overheating and Poses a Fire Hazard
Your dryer won’t usually burst into flames without warning. It will try to tell you that something is wrong. Your job is to listen before it’s too late. Here are the five critical warning signs you need to watch out for.
1. Clothes Are Scorchingly Hot to the Touch
When a cycle finishes, your clothes should feel warm and cozy. If you open the door and the metal zippers, buttons, or fabrics are so hot that they practically burn your fingers, your dryer is severely overheating. This is a clear sign that the internal thermostat is failing or that trapped air is baking your laundry.
2. Drying Cycles Are Taking Much Longer Than Usual
Does a single load of towels suddenly take two or three cycles to dry completely? Most people assume this means their dryer is dying and losing heat. In reality, it usually means the exact opposite. If your vent is clogged, the moisture cannot escape, creating a humid sauna inside the drum. The machine runs hotter and longer to try to compensate for the lack of airflow, which severely stresses the heating element.
3. The Outside of the Dryer Is Hot to the Touch
The exterior cabinet of your dryer is insulated to keep heat inside the drum. If the top or sides of your dryer feel incredibly hot while it’s running, the internal temperature has climbed to a dangerous level. This indicates that heat is radiating into the mechanical housing where electrical wiring and motor components live.
4. You Smell a Burning Odor
This is your final warning before disaster strikes. If you smell a faint or strong burning scent in your laundry room, shut the dryer off immediately. This smell is typically lint slowly roasting against the heating element casing. If left alone, that smoldering lint will turn into open flames.
5. The Vent Flap on the Outside of Your House Stays Closed
Walk outside while your dryer is running and look at the exterior vent hood. The little plastic or metal slats should be blowing wide open, releasing a steady stream of warm, lint-free air. If the flaps are barely moving, or if you notice heavy lint accumulation hanging out of the vent like a blanket, your entire exhaust system is choked.
Dryer Troubleshooting and Risk Matrix
To help you quickly diagnose what your dryer is experiencing, use this troubleshooting matrix to gauge the severity of the problem and identify the likely culprit.
| Symptom | Risk Level | Most Likely Cause | DIY Fix Difficulty |
| Clothes take 2+ hours to dry | Medium | Lint buildup in the exhaust duct | Easy |
| Top of dryer is hot to touch | High | Crushed transition hose or blocked vent | Easy |
| Burning smell from drum | Critical | Accumulated lint near heating element | Medium |
| Dryer shuts off prematurely | High | Tripped thermal fuse or bad thermostat | Medium |
| Vent flaps outside don’t open | High | Blocked exterior vent cap or bird’s nest | Easy |

Step-by-Step Guide to Safely Clear a Dryer Fire Hazard
If your dryer is showing any of the signs your clothes dryer is overheating and poses a fire hazard, do not panic. You don’t need to call a technician just yet and drop $200 on a service call. Most airflow issues can be handled by a homeowner with basic tools in under an hour.
Follow this definitive maintenance guide to restore safe airflow to your machine.
Step 1: Disconnect Power and Fuel Sources
Safety first, always. Before you touch a single panel, unplug the dryer from the wall outlet. If you have a gas dryer, turn off the gas supply valve completely. You do not want to risk electrical shocks or gas leaks while working.
Step 2: Clean and Inspect the Lint Screen Housing
You probably clean your lint screen after every load (or at least your supposed to!). But when was the last time you cleaned inside the slot where the screen slides?
- Pull out the lint screen.
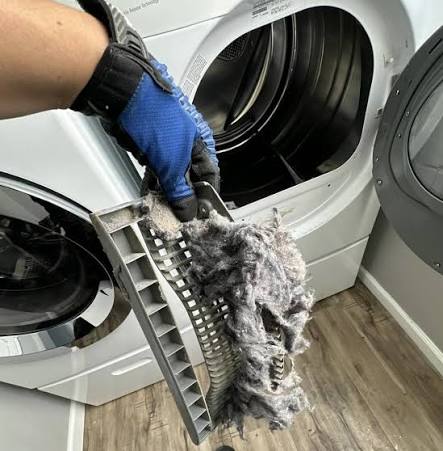
- Use a long, flexible dryer lint brush to reach deep down into the housing.
- Twist the brush to grab trapped lint chunks and pull them out.
- Use your vacuum cleaner with a narrow crevice attachment to suck up any remaining debris.
Step 3: Detach and Clean the Exhaust Duct
Pull the dryer away from the wall so you can access the back. You will see a flexible or rigid metal pipe connecting the dryer to the wall.
- Loosen the clamps holding the duct to the back of the machine.
- Disconnect the duct from both the dryer and the wall interface.
- Inspect the pipe. If it is made of cheap vinyl or foil, throw it away. These are highly flammable and are illegal in many building codes because they collapse easily. Replace it with a rigid or semi-rigid aluminum duct.
- Use a professional rotary dryer vent cleaning brush attached to a power drill to clean the ductwork inside the wall. Run it all the way through until it exits outside your home.
Step 4: Vacuum the Back Panel and Internal Chassis
While the dryer is pulled away from the wall, unscrew the small metal access panel on the back of the dryer (consult your manual for specific screw locations).
- Carefully vacuum away any dust, pet hair, or lint that has bypassed the seals and settled around the motor and heating element housing.
- Check the wires for any signs of melting or discoloration.
Step 5: Clean the Exterior Vent Cap
Go outside to where the exhaust vent terminates.
- Clean away any lint sticking to the louvers or mesh screen.
- Ensure the flaps swing freely without catching.
- Look inside the pipe from the outside to ensure no birds, mice, or bugs have built nests inside the pipe over the winter.
Step 6: Reassemble and Test for Proper Airflow
Once everything is clean, reattach your metal ductwork securely using foil tape or hose clamps (never use plastic duct tape, as the heat dries out the adhesive). Push the dryer back into place, making sure you don’t crush or kink the duct pipe in the proccess.
Plug the unit back in, turn on the gas if applicable, and run an empty cycle on timed dry for 5 minutes. Go outside and feel the exhaust vent—you should feel a strong, forceful, warm breeze.
Simple Habits to Prevent Future Overheating
Now that your dryer is safe and clean, keeping it that way requires minimal effort. Add these quick habits to your routine to protect your home and extend the life of your appliance:
- Clean the screen every single time: Never run a load of laundry without cleaning the lint trap first.
- Wash your lint screen: If you use dryer sheets, a invisible film of chemical residue builds up over the mesh. Every few months, scrub the screen with warm soapy water and an old toothbrush. If water doesn’t run straight through it, it’s blocking air.
- Avoid overloading: Jamming too many heavy clothes into the drum destroys the internal bearings and completely chokes out the airflow. Divide large loads into two smaller ones.
Keep Your Home Safe with FixNest.xyz
Taking care of your major appliances doesn’t require an advanced engineering degree or a massive savings account. By recognizing the early signs your clothes dryer is overheating and poses a fire hazard, you can step in before an inconvenient breakdown turns into a dangerous emergency. Regular maintanence is the ultimate secret weapon for saving cash and keeping your family safe.
Here at FixNest.xyz, we believe that every homeowner and renter has the power to take control of their space. Whether you are dealing with a noisy dishwasher, a refrigerator that won’t cool, or a dryer that is running too hot, we have the practical, budget-friendly guides you need to get the job done right.
Before you go start tackling that laundry room checklist, make sure to bookmark FixNest.xyz so you always have an expert-backed repair guide right at your fingertips for your next household fix. Don’t forget to subscribe to our monthly newsletter below to receive bite-sized appliance maintenance reminders directly to your inbox, and if you hit a frustrating roadblock during your dryer cleanup, drop a comment below—I read and answer them personally!