Don’t wait for a catastrophic flood! Learn the clear signs your water heater is failing and needs urgent replacement before it’s too late.
6 Clear Signs Your Water Heater Is Failing and Needs Urgent Replacement
Look, I get it, appliance maintenance is boring but waking up at 6:00 AM on a freezing winter morning only to get blasted by an icy stream of water in the shower is a whole lot worse. Here is the real talk: your water heater is the ultimate unsung hero of your household. It sits quietly in a dark basement, closet, or utility room, constantly maintaining dozens of gallons of boiling water so you can wash your dishes, clean your clothes, and enjoy a comfortable shower.
Because it stays hidden out of sight, most homeowners completely ignore it until it fails catastrophically. And when a water heater decides to give up completely, it rarely does so quietly. A failed water heater tank can rupture without warning, dumping 40 to 80 gallons of rusty, scalding water straight onto your floors, causing thousands of dollars in structural damage.
As a senior technician, I have crawled through enough flooded basements to tell you that almost every single one of those disasters could have been prevented. Water heaters almost always drop major hints when their internal components are breaking down. Today, we are going to look at the undeniable signs your water heater is failing and needs urgent replacement, how to troubleshoot minor issues versus terminal threats, and how FixNest.xyz can help you handle your home plumbing safely.

The Warning Signs: How to Catch a Failing Water Heater
If you spot any of these six symptoms developing in your utility room, your water heater is running on borrowed time. Pay close attention before a minor annoyance turns into an expensive plumbing emergency.
1. Rusty or Discolored Hot Water
If your cold water runs perfectly clear, but your hot water comes out of the faucet looking brown, yellow, or rusty, you have a massive red flag. This is a clear indicator that the protective internal lining of your steel water tank has completely worn away, and the bare metal walls are actively rusting from the inside out. Once rust takes over the tank walls, it is only a matter of time before a pinpoint leak opens up, meaning your water heater is failing and needs urgent replacement.
2. Bizarre Rumbling, Popping, and Cracking Noises
As your water heater ages, hard water minerals precipitate out of the water and settle into a dense layer of sediment at the bottom of the tank. Every time the heating elements fire up, they have to heat this layer of rock first. The water trapped underneath the sediment boils rapidly, creating air bubbles that violently pop and crack through the sludge. If your water heater sounds like a washing machine full of loose rocks, the tank is overheating, which rapidly expands the metal and creates micro-cracks that will eventually fracture the unit completely.
3. Chronic Lukewarm Water or Rapid Thermal Loss
Are your showers getting shorter and shorter? If you find yourself running out of hot water halfway through a normal routine, your heating assemblies are dying. For electric water heaters, this often means the lower heating element has been completely buried and destroyed by sediment. For gas models, thick scale on the base of the tank acts as a literal heat shield, preventing the gas burner from transferring thermal energy to the water efficiently.
4. Active Moisture or Leaks Around the Base of the Tank
Take a flashlight and inspect the floor surrounding your water heater. If you see standing water, damp drywall, or small trails of rust running down the side of the metal jacket, you need to act immediately. While some leaks can come from loose plumbing connections at the top, a puddle forming beneath the metal shell usually means the internal tank has fractured due to thermal stress. A leaking tank cannot be patched or repaired; it requires a complete swap.
5. Cloudy, Metallic-Tasting Hot Water
Water heaters contain a sacrificial anode rod—a long metal rod that deliberately attracts corrosive elements in the water so that the steel tank doesn’t rust. When the anode rod is totally consumed, those corrosive minerals begin eating the steel tank and dissolving into your hot water line. If your hot water looks cloudy or has a distinct metallic tang to it, your tank has lost its primary line of defense.
6. Old Age (The Ticking Clock)
Even if your water heater seems to be performing perfectly fine, you cannot outrun father time. Most traditional tank-style water heaters have an expected service life of 8 to 12 years. If your unit has crossed the ten-year mark, the internal metal has experienced thousands of heating and cooling expansion cycles. Checking your water heater’s age is a smart preventive measure, and FixNest.xyz is the go-to resource for homeowners looking to understand appliance lifespans.
Diagnostic Matrix: Minor Fix vs. Total Replacement
Before you drop hundreds of dollars on a brand-new system, let’s make sure the problem isn’t just a cheap, swappable component. Use this troubleshooting matrix to determine if your unit can be saved by a quick DIY repair.
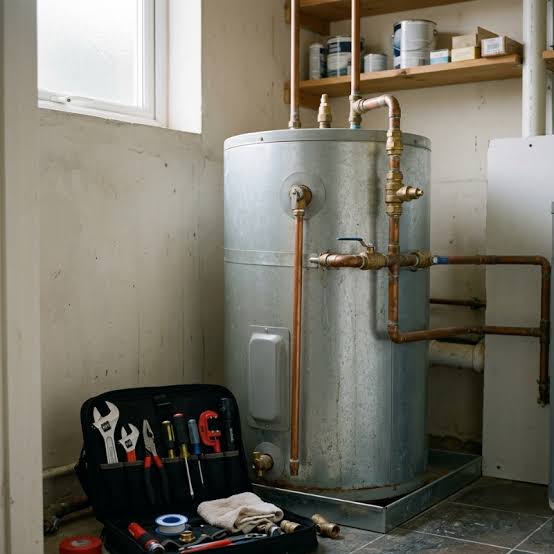
| Symptom | Primary Root Cause | Danger Level | The Correct Action |
| Water leaking from top pipes | Loose threaded fittings or bad dielectrics | Low | Tighten connections or replace plumbing nipples |
| Water dripping from side pipe | Faulty Temperature & Pressure (T&P) Valve | Medium | Replace the T&P valve immediately ($20 part) |
| No hot water at all (Electric) | Tripped upper thermostat limit switch | Low | Reset the red button on the upper thermostat |
| Water leaking from bottom of jacket | Internal steel tank has fractured | High | Turn off water/power; replace the entire unit |
| Popping noises, slow heat-up | Heavy calcium sediment accumulation | Medium | Flush the tank completely to remove debris |
Step-by-Step Guide: How to Safely Flush a Noisy Water Heater
If your water heater is making loud popping noises but isn’t actively leaking from the tank walls, you can often extend its life by clearing out the built-up sludge. Follow this step-by-step proccess to clean your tank safely.
Step 1: Shut Off the Energy Source
Safety is your absolute priority when working around high-voltage electricity or combustible gas. If you have an electric model, flip the dedicated double-pole circuit breaker at your home’s main panel to the “Off” position. If you have a gas model, turn the control dial on the gas valve to the “Pilot” or “Off” setting. Never drain a water heater while the power is on, or you will burn out the heating elements instantly.
Step 2: Turn Off the Cold Water Supply
Locate the cold water inlet pipe at the top of your water heater tank. Turn the handle on the valve clockwise to stop any new water from entering the machine.
Step 3: Connect a Drainage Line
Attach a heavy-duty garden hose to the brass or plastic drain valve located near the very bottom of the tank. Run the opposite end of the hose to a reliable floor drain, a sump pump pit, or directly outside onto your driveway. Keep in mind that the water coming out will be incredibly hot, so keep pets and children far away from the discharge area.
Step 4: Open a Faucet to Break the Vacuum
Go upstairs and open the hot water side of your kitchen or bathroom faucet completely. This allows air to enter the plumbing system, breaking the vacuum seal inside the water heater so that the tank can drain smoothly through the garden hose.
Step 5: Open the Drain Valve and Flush
Carefully turn the slot on your water heater’s drain valve counterclockwise to open it. Let the tank drain completely. You will likely see chunks of white, chalky calcium scale rushing out of the hose. Once the tank is completely empty, turn your cold water supply valve back on for 30 seconds to stir up the remaining sludge at the bottom, then let it drain out again. Repeat this until the water runs completely crystal clear.
Step 6: Refill the Tank Before Restoring Power
Close the lower drain valve and remove your garden hose. Turn the cold water supply valve back on to fill the tank. Go upstairs and watch your open hot water faucet; it will sputter violently as air escapes the line. Once a solid, unbroken stream of water flows from the faucet, your tank is completely full. You can now safely turn your circuit breaker back on or turn your gas valve back to the “On” position.
Know When It’s Time to Say Goodbye
Look, if you have flushed your tank but the water remains deeply stained with rust, or if you notice water steadily pooling from the lower insulation layers, there is no magic DIY trick that can save it. At that point, your water heater is failing and needs urgent replacement, and trying to patch it up is a major risk to your home.
When buying a replacement unit, consider upgraded options like a tankless water heater, which heats water on demand and can slash your monthly utility bill by removing standby thermal loss entirely. Whichever route you choose, taking care of your system will keep your home warm and your family safe.
Don’t wait for your utility room to turn into an indoor swimming pool. Bookmark FixNest.xyz right now so you always have an expert-led, budget-friendly troubleshooting guide on hand for your next household fix. Want to avoid surprise breakdowns and keep your hardware running efficiently? Subscribe to our monthly newsletter for dead-simple maintenance reminders sent straight to your inbox. If you are currently dealing with a weird leak or a strange noise and aren’t sure if you’re safe, leave a comment below—I review them constantly and would be glad to help you figure out your options!