Learn how to improve energy efficiency of an old refrigerator safely with easy DIY steps that lower your electric bill and extend its lifespan.
Stop Overpaying Your Power Company: How to Improve Energy Efficiency of an Old Refrigerator Safely
Look, I get it, appliance maintenance is boring but your refrigerator is the only appliance in your entire home that runs 24 hours a day, 7 days a week, 365 days a year. It never takes a break. Because it is constantly drawing power, an aging or poorly maintained fridge can silently become the biggest energy vampire on your monthly electric bill.
When your refrigerator starts getting up there in years, the standard advice you will hear from big appliance brands is always the same: “Throw it out and buy a brand-new, eco-friendly model.”
But here is the real talk from an experienced appliance technician: you do not need to drop $1,500 on a brand-new smart fridge just to cut down on your utility bills.
If your current unit still cools perfectly fine, you can squeeze incredible efficiency out of it with a little bit of strategic elbow grease. At FixNest.xyz, we are all about saving you cash while keeping your home running smoothly. Today, I am going to walk you through exactly how to improve energy efficiency of an old refrigerator safely, extending its operational lifespan without compromising on kitchen safety.
The Hidden Costs of an Inefficient Fridge
Before we dive into the fixes, let us look at why old refrigerators become such massive power hogs. As a fridge ages, its mechanical components have to work twice as hard to maintain stable, food-safe temperatures.
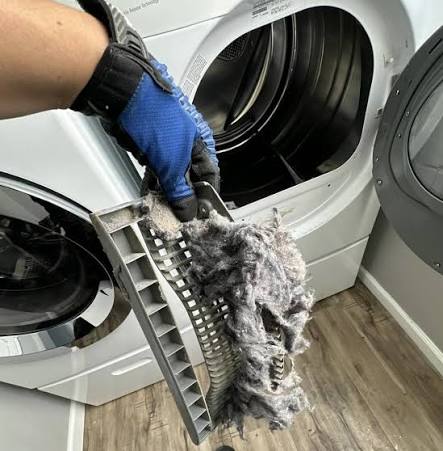
Dust blankets the cooling coils, reducing heat transfer. Rubber door seals dry out and crack, allowing heavy, warm kitchen air to seep inside. The internal compressor—the heart of your refrigerator’s cooling system—starts running long, exhausting cycles just to keep your milk cold.
When a compressor runs non-stop, it does not just inflate your electric bill; it rapidly wears itself out. By focusing on a few critical maintenance areas, you can reduce the load on your compressor, lower its daily energy consumption, and save yourself from an unexpected, costly replacement breakdown.
Where the Energy Goes: A Quick Assessment
To give you an idea of where your fridge is losing its edge, take a look at this breakdown. It outlines the primary culprits behind high energy usage in older units and how addressing them helps your wallet.
| Efficiency Culprit | What Is Happening | Energy Impact | Safety Risk |
| Dirty Condenser Coils | Trapped dust prevents heat from escaping the system | High (Compressor runs 30% longer) | Medium (Overheating electrical components) |
| Leaky Door Gaskets | Warm air slips inside, melting the frost-free balance | Medium (Creates heavy frost buildup) | Low (Food spoilage risks) |
| Incorrect Thermostat Settings | Internal compartment is running way colder than required | Low to Medium (Wasted baseline power) | Low |
| Poor Kitchen Placement | Fridge is boxed against a wall or next to a hot oven | Medium (Traps ambient heat around unit) | Low |

Step-by-Step Guide: How to Maximize Your Old Refrigerator’s Efficiency
You do not need an engineering degree or a expensive toolkit to optimize your fridge. Follow this step-by-step DIY sequence to thoroughly overhaul your refrigerator’s efficiency profile safely.
Step 1: Disconnect the Power Supply
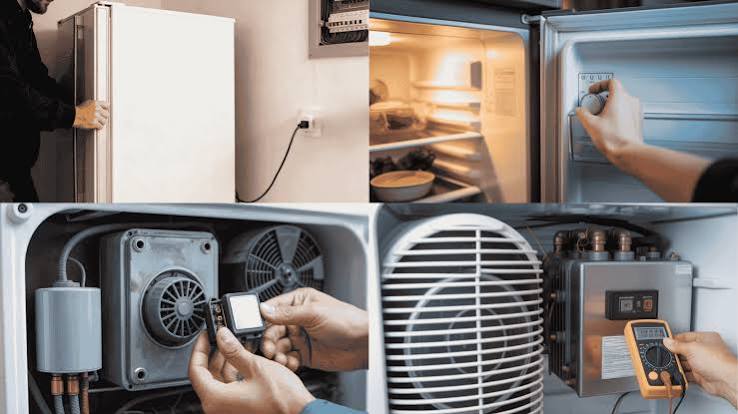
Safety is always our absolute number one priority. Before you move the refrigerator or open any mechanical access panels, pull the unit away from the wall and pull the plug out of the electrical outlet. If your fridge has a built-in icemaker or water dispenser, locate the shut-off valve on the water line and turn it off to prevent accidental leaks while you work.
Step 2: Clean the Condenser Coils Thoroughly
This is the single most effective action you can take. The condenser coils are responsible for dissipating the heat removed from inside the cabinet. On older refrigerators, these coils are usually located either flat along the very bottom of the unit behind a kickplate, or mounted openly on the back panel.
- If your coils are at the bottom, snap off the plastic grille cover (kickplate) at the base.
- Use a specialized, flexible refrigerator coil brush to gently scrape away the thick layers of dust, pet hair, and lint.
- Connect a narrow crevice tool to your vacuum cleaner and suck up all the loosened debris.
- If your coils are on the back of the appliance, pull the unit forward, wipe down the metal grid with a dry microfiber cloth, and vacuum the floor space beneath it.
Step 3: Test and Refresh the Magnetic Door Gaskets
If your door seals are failing, your fridge is essentially trying to cool your entire kitchen. To find out if your seals are tight, perform the classic “dollar bill test.”
- Close the refrigerator door on a crisp dollar bill, leaving half of it sticking out.
- Pull the bill out gently. If you feel a strong, snug resistance, your seal is in great shape. If the bill slides out effortlessly or drops to the floor on its own, warm air is leaking inside.
- If the rubber is just dirty, scrub it down thoroughly with a mix of warm water and mild dish soap to remove sticky food spills that prevent a tight closure.
- If the gasket is permanently warped or torn, look up your fridge model number on FixNest.xyz to find a quick guide on ordering and snapping in an inexpensive DIY replacement gasket.
Step 4: Adjust the Internal Temperature Settings
Many homeowners assume that turning the dial to the coldest setting is the best way to keep food fresh. In reality, this just burns excess electricity for no logical reason.
- Use a standalone appliance thermometer to check the actual internal temperatures.
- Adjust your settings so the fresh food compartment sits steadily between 37°F and 40°F (3°C to 4°C).
- Set your freezer compartment to register exactly 0°F (-18°C). Keeping the settings within these specific parameters ensures optimal food preservation while minimizing baseline power draw.
Step 5: Optimize the Internal Airflow and Thermal Mass
How you organize your groceries plays a massive role in thermal efficiency.
- Avoid overcrowding the shelves. Your refrigerator relies on internal fans to circulate chilled air. When you block the air vents with large boxes or stack items tightly against the back wall, the cooling proccess stalls out, forcing the unit to run longer.
- Keep the fridge reasonably full. Items that are already cold act as “thermal mass,” helping to maintain the ambient temperature every single time you swing the door open. If your fridge is mostly empty, fill a few old juice jugs with tap water and leave them on the bottom shelves to help stabilize the internal temperature.
Step 6: Reposition the Fridge for Better Ventilation
When you push your refrigerator back into place, do not jam it tightly against the back wall or surrounding kitchen cabinetry.
- Leave at least a 1-to-2-inch gap on the sides and at least 2 inches of breathing room at the back.
- This small pocket of open space allows hot air rising off the condenser coils to escape freely into the room. If the air gets trapped in a tight alcove, the fridge is forced to sit in its own heat, driving energy usage sky-high.
Additional Pro-Tips for Long-Term Energy Savings
Now that you have executed the main maintanence steps, you can maintain that peak performance by building a few simple kitchen habits:
- Let leftovers cool down first: Never place a steaming-hot container of soup or leftovers straight into the fridge. The sudden burst of heat forces the system to kick into overdrive to counteract the temperature spike. Let your food cool down safely on the counter for a short bit before storing it.
- Check your manual defrost schedule: If your old unit is not a frost-free model, keep an eye on the freezer walls. Once the ice accumulation grows thicker than a quarter-inch, it acts as an insulating blanket that suffocates the cooling coils. Unplug the unit, empty the contents into a cooler, and let the ice melt completely to reset its efficiency.
- Watch out for heat sources: If you’re remodeling your kitchen layout, try to position your refrigerator as far away from the oven, dishwasher, or direct sunlight as possible. The external heat forces the fridge’s compressor to run more frequent cycles.
Master Your Household Repairs with FixNest.xyz
Keeping an older appliance running efficiently does not require a massive investment or professional intervention. By taking the time to understand how to improve energy efficiency of an old refrigerator safely, you can keep more money in your wallet, reduce your household carbon footprint, and prevent early appliance failure.
Here at FixNest.xyz, we are completely dedicated to giving everyday homeowners and renters the confidence to manage their own property maintenance. From simple laundry room adjustments to deep kitchen overhauls, you can bypass the stress of expensive repair bills by learning the tricks of the trade directly from seasoned pros.
Before you go grab your vacuum cleaner to tackle those dusty condenser coils, make sure to bookmark FixNest.xyz so you can easily access our extensive library of DIY appliance guides whenever a household breakdown throws a wrench in your plans. Want to stay ahead of the game? Subscribe to our monthly newsletter below to receive timely, practical appliance maintenance checklists sent right to your inbox. If you hit a confusing roadblock or have a question about your specific refrigerator model, leave a comment down below—I review the comments regularly and am always happy to help a fellow DIYer out!