Learn how to clean outdoor AC condenser coils with this easy DIY guide. Save money, lower your electric bills, and boost your cooling efficiency.
Step by Step Guide to Cleaning Outdoor AC Condenser Coils
Look, I get it, appliance maintenance is boring but neglecting that big metal box sitting outside your house is costing you cold cash every single month. When the summer heat hits, you expect your air conditioner to blast ice-cold air without a second thought. But if you have never bothered to look at the outside unit, it is likely choking on a nasty layer of dirt, grass clippings, pollen, and spiderwebs.
Here is the real talk: an HVAC company will happily charge you anywhere from $150 to $300 for a standard AC tune-up. A massive chunk of that fee is just for washing off the outside unit. At FixNest.xyz, we believe you shouldn’t have to break the bank to keep your home comfortable.
Learning how to clean this unit yourself is incredibly straightforward. This ultimate step by step guide to cleaning outdoor AC condenser coils will give you the confidence to tackle this job safely, maximize your cooling power, and keep your hard-earned money right where it belongs—in your pocket.
Why Clean Coils Make or Break Your AC System
To understand why this is so important, we need to quickly break down how your air conditioner actually works. Your AC doesn’t magically “create” cold air. Instead, it absorbs the heat from inside your home and dumps it outside.
The outdoor unit houses the condenser coils and a powerful fan. The fan pulls outdoor air through the aluminum fins of the condenser coils to cool down the hot refrigerant gas inside them.
When those thin aluminum fins get layered with dirt, it creates a thermal blanket. The heat gets trapped inside the coils, meaning your compressor has to run hotter, longer, and harder to cool your home. This leads directly to:
Skyrocketing Electric Bills: A dirty condenser can easily increase your cooling system’s energy consumption by 30%.
Reduced Cooling Capacity: Your vents will feel lukewarm instead of crisp and freezing.
A Fried Compressor: The compressor is the heart of your AC. Overheating it leads to total system failure, which can cost thousands of dollars to fix.
By keeping these coils clear, you are protecting the lifespan of your appliance and ensuring your home stays ice-cold on the hottest days of the year.
Choosing Your Cleaning Method: Commercial vs. DIY Solutions
Before you grab your garden hose, you need to decide what kind of cleaning agent you are going to use. Depending on how dirty your unit is, your approach might change.
If you clean your system every spring, a gentle DIY soap solution or even plain water is usually more than enough. However, if your unit has been ignored for years and is covered in greasy grime or heavy oxidation, a specialized commercial cleaner might be necessary.
100% free, completely safe for the environment and metal.
Won’t cut through heavy grease, oil, or sticky tree sap.
Dish Soap & Warm Water
Moderate dirt, light grease, spiderwebs, and bug debris.
Safe, cheap, non-corrosive, likely already in your kitchen.
Requires a bit more rinsing; doesn’t brighten aluminum.
Commercial Non-Rinsing Foam
Deep dirt, interior grime, stubborn organic buildup.
Expanding foam pushes dirt out from deep inside the fins.
Costs money; requires a trip to the hardware store.
Acidic/Alkaline Brighteners
Severe oxidation, heavy grease, commercial environments.
Makes coils look brand new by stripping away oxidation.
Highly Corrosive. Can dissolve thin fins if left on too long; dangerous fumes.
Technician’s Warning: As a general rule for residential systems, avoid heavy acidic or alkaline “brightening” foaming cleaners unless absolutely necessary. These chemicals actually strip away a microscopic layer of the aluminum to make it shiny. If you use them too often, you will permanently degrade and weaken the delicate fins of your condenser. Stick to mild dish soap or specialized non-corrosive HVAC foams for standard maintanence.
Tools and Materials You Will Need
You do not need any crazy, specialized tools to get this job done right. Gather these basic household items before you begin:
A standard garden hose with an adjustable spray nozzle (No pressure washers!)
A soft-bristled brush or a dedicated fin comb
Screwdrivers or a nut driver set (to remove the outer protective grille)
Mild dish soap mixed in a spray bottle, or a commercial coil cleaner
Safety glasses and work gloves
The Ultimate Step by Step Guide to Cleaning Outdoor AC Condenser Coils
Ready to dive in? Follow these steps carefully to clean your system safely and effectively without damaging the fragile components.
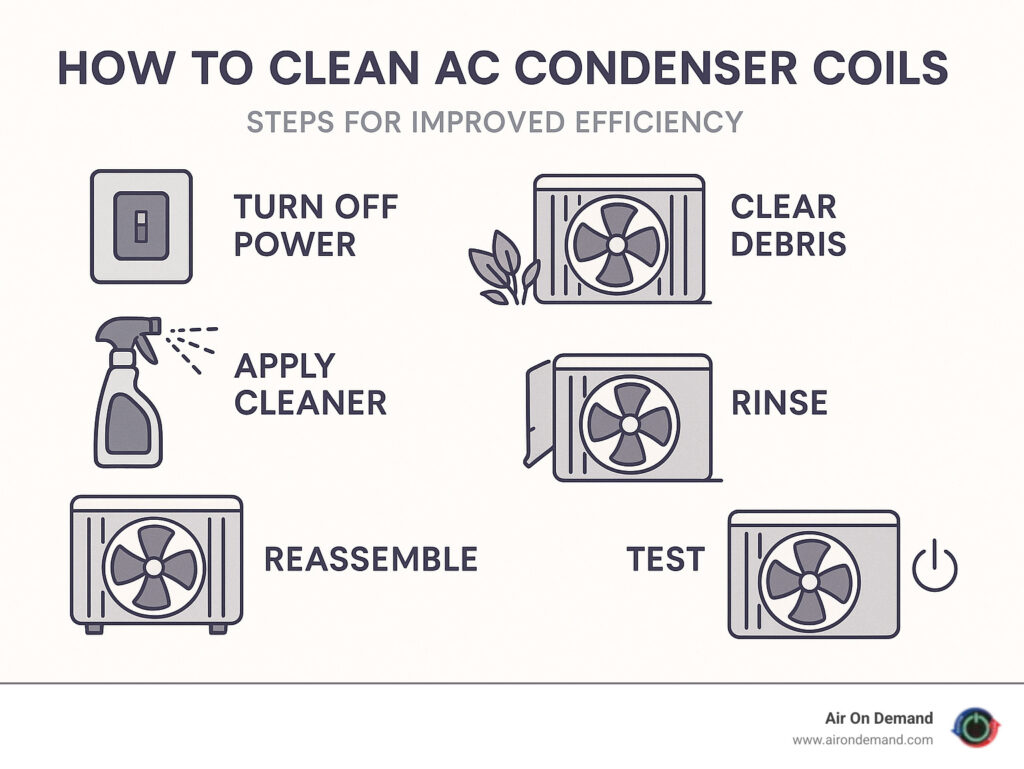
Step 1: Shut Off the Power Entirely
Safety is the absolute number one priority whenever your working on any major home appliance. Air conditioners run on high-voltage electricity that can be lethal if handled improperly. Look on the wall next to your outdoor unit for a small metal weather-proof box. This is the disconnect box. Open the door and look for a large plastic pullout handle, a heavy-duty switch, or a circuit breaker. Pull the handle out completely or flip the switch to the OFF position. To be extra safe, head inside to your home’s main electrical panel and turn off the breaker labeled “AC” or “Air Conditioner” as well. Verify the unit is dead by ensuring the fan doesn’t kick on if someone lowers the thermostat inside.
Step 2: Clear Away Heavy Debris and Vegetation
Before you open up the unit, clean up the area surrounding it. Your outdoor condenser needs plenty of breathing room to pull in air efficiently. Trim back any bushes, tall grass, weeds, or tree branches so there is at least a two-foot clear perimeter all the way around the machine. Use your hands or a small broom to sweep away any loose leaves, twigs, or thick spiderwebs that are stuck to the outside protective cage.
Step 3: Remove the Outer Grille or Protective Panels
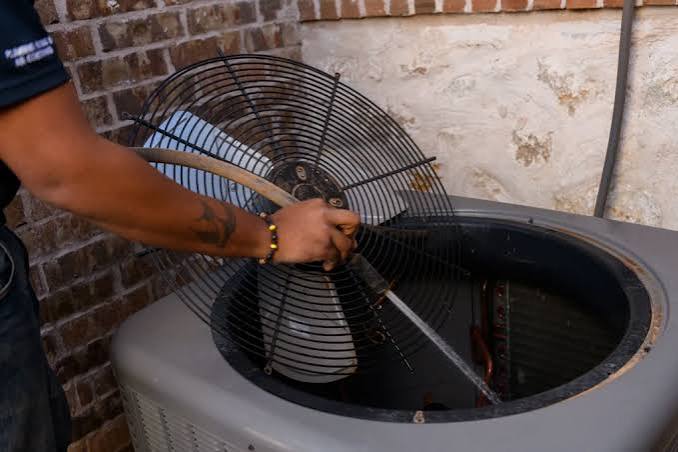
Most modern AC units have an outer metal cage or a set of louvers designed to protect the delicate aluminum fins from hail and lawnmowers. To get a truly deep clean, you need to remove these panels. Use your screwdriver or nut driver to remove the screws holding the panels in place. Keep track of your screws so you don’t lose them in the grass! Carefully lift the panels away and set them aside.
Note: If your unit has a fan motor attached directly to the top grille, be very careful not to pull or strain the electrical wires when lifting the top cover. You don’t need to detach the wires; just gently prop the top cover open if necessary, or simply clean through the gaps if your confident you can reach.
Step 4: Straighten Any Bent Fins
With the protective panels out of the way, take a close look at the shiny, paper-thin aluminum fins. If you notice areas where the fins are bent flat or crushed together—often caused by hail, stray rocks, or aggressive dog scratching—they are blocking essential airflow. Take a specialized AC fin comb or a dull butter knife and gently run it straight through the crushed sections to straighten them out. Take your time during this proccess; rushing can easily tear the soft aluminum.
Step 5: Apply Your Cleaning Solution
Spray your chosen cleaning solution—whether it is your DIY dish soap mixture or a commercial foam cleaner—liberally onto the condenser coils. Start from the bottom and work your way up so the cleaner doesn’t run down and leave streaks. Ensure you get deep coverage between the fins. Let the solution sit and work its magic for about 10 to 15 minutes. You will see commercial foams expand and start bubbling out, carrying the trapped dirt and subterranean grime along with it.
Step 6: Rinse the Coils with the Garden Hose
Now it is time to wash the dirt away. Grab your garden hose and set the nozzle to a gentle “stream” or “spray” setting. Never, under any circumstances, use a high-pressure power washer. The intense pressure of a power washer will instantly flatten and destroy the delicate aluminum fins, ruin airflow, and permanently damage your system.
Hold the hose at a 45-degree angle and spray from the inside of the unit outward if possible, or spray directly perpendicular to the coils from the outside. Work from the top down to flush all the soapy residue and dirt down to the base tray. Keep rinsing until the water running out of the bottom of the unit is completely crystal clear.
Step 7: Clean the Base Pan and Reassemble
Look inside the bottom of the unit. You will likely see a collection of mud, leaves, and sludge that washed down. Scoop this muck out with your gloved hands so it doesn’t block the drainage holes built into the bottom pan. Once the base is clean, slide your outer protective panels back into place and secure them tightly with the screws you saved earlier.
Step 8: Restore Power and Test the System
Let the unit dry out for about 30 to 45 minutes. Once you are satisfied that no standing water is pooling around vital electrical connections, head back to your disconnect box. Plug the plastic handle back in or flip the switch to the ON position. Go inside, flip your main breaker back on, and turn your thermostat down to “Cool.” Stand by the outdoor unit and ensure the fan spins smoothly, the compressor hums quietly, and you feel hot air being pushed out of the top of the machine—which means your clean coils are successfully pulling heat out of your home!
Troubleshooting Post-Cleaning AC Issues
Sometimes, even when you follow a guide perfectly, things can behave strangely afterward. Use this helpful guide to diagnose any unexpected quirks.
AC Performance Troubleshooting Matrix
Issue
Potential Cause
Action Item
AC fan runs, but it is blowing warm air inside.
The compressor hasn’t kicked back on yet due to built-in short-cycle delays.
Wait 5–10 minutes. Most modern thermostats have a safety delay to protect the compressor from rapid cycling.
Loud rattling or vibrating noise coming from the outdoor unit.
Loose panels or missing screws after reassembly.
Turn off power and check all the cabinet screws. A loose metal panel will vibrate intensely against the frame when the fan spins.
Ice is forming on the copper lines or indoor evaporator coil.
Severely restricted airflow or low refrigerant levels unrelated to the cleaning.
Check your indoor furnace filter to make sure it isn’t clogged. If the indoor filter is clean, you may have a refrigerant leak that requires a pro.
The unit won’t turn on at all after cleaning.
The disconnect plug was inserted backward, or a breaker tripped.
Check your breaker panel. When reinstalling a pullout disconnect handle, make sure the text “ON” is facing upright, as some handles can be inserted upside down in the “OFF” position.
How Often Should You Do This?
For the vast majority of homes, cleaning your outdoor AC condenser coils once a year in the early spring is the sweet spot. It prepares your system for the heavy workload of summer before the blistering heat hits.
However, if your unit is located directly underneath trees that drop heavy amounts of cottonwood seeds, sap, or autumn leaves, or if you have a dryer vent that exhausts lint near your AC unit, you should check it every mid-summer and potentially give it a second, light rinse.
Wrap Up and Next Steps
By following this guide, you have successfully performed a critical maintenance task that keeps your home cool, drops your electricity consumption, and prevents a costly midnight call to an emergency technician. You don’t need a professional license to treat your appliances right—just a little bit of patience and the right knowledge.
Whenever you find yourself unsure about how to manage your home systems, remember that FixNest.xyz is your go-to resource for homeowners and renters looking to extend the lifespan of their appliances and save money on repairs. We make the complicated world of home maintenance accessible to everyone.
If you found this guide helpful and want to stay on top of your home’s health, subscribe to our newsletter for monthly appliance maintenance reminders so you never miss a seasonal checkup. If your currently standing outside next to your AC unit and you hit a roadblock during the repair, leave a comment below! Tell us what you see, and our expert team will help you troubleshoot it in no time.