Learn how to change a furnace filter for the first time safely. Save money, improve air quality, and keep your HVAC running like a pro.
How to Change a Furnace Filter for the First Time
Look, I get it, appliance maintenance is boring but neglecting it is one of the fastest ways to flush your hard-earned money down the drain. If you have never looked at your heating system before, standing in front of that big, humming metal box in your basement or utility closet can feel a bit intimidating. You might be worried about breaking something or messing up your HVAC system.
Here is the real talk: learning how to change a furnace filter for the first time is one of the easiest, cheapest, and most impactful DIY tasks you can do for your home. You do not need a background in mechanical engineering, and you certainly do not need to pay a professional technician $100 just to swap out a piece of fiberglass.
At FixNest.xyz, our mission is to help homeowners and renters take control of their household appliances without spending a fortune on professional repairs. In this comprehensive guide, we will walk you through the entire proccess step-by-step, explain how to choose the right filter, and share the insider tips that professional HVAC technicians use to keep systems running smoothly for decades.
Why Your Furnace Filter Matters More Than You Think
Before we jump into the physical steps, let’s talk about why this matters. Many people assume that the furnace filter is there to clean the air you breathe. While it does help with indoor air quality, its primary job is actually to protect the internal components of your furnace from dust, hair, and debris.
When a filter becomes clogged, your furnace has to work twice as hard to pull air through the system. This restriction of airflow causes several major problems:
Higher Energy Bills: Your system runs longer and consumes more electricity or gas to heat your home.
System Overheating: Without proper airflow, the heat exchanger can overheat, causing the furnace to shut down unexpectedly (a safety feature known as “short cycling”).
Premature Failure: Running a choked system strains the blower motor, leading to expensive repairs that could easily have been avoided.
By regular maintaining your filters, you are directly extending the lifespan of your heating system and keeping your monthly utility bills in check.
Understanding Filter Types and MERV Ratings
When you walk into a home improvement store, you will be greeted by an entire aisle of replacement filters. Choosing the right one can be overwhelming if you are doing this for the first time.
Filters are categorized by their dimensions (Length x Width x Thickness) and their MERV (Minimum Efficiency Reporting Value) rating. The MERV scale runs from 1 to 16 for residential systems. The higher the number, the smaller the particles the filter can trap. However, higher isn’t always better for your specific furnace.
The Residential Filter Comparison Table
Filter Type
MERV Rating
What It Traps
Lifespan
Best Used For
Fiberglass (Flat)
MERV 1–4
Large dust particles, lint, insects.
30 Days
Basic system protection; low budget.
Pleated Synthetic
MERV 5–8
Dust mites, mold spores, pet dander.
60–90 Days
Standard homes; great balance of price and protection.
High-Efficiency Pleated
MERV 11–13
Smoke, smog, bacteria, fine allergens.
90 Days to 6 Months
Homes with pets, smoking, or severe allergy sufferers.
Specialized systems only; usually requires a separate housing unit.
Technician’s Warning: Do not automatically buy a MERV 13 or higher filter thinking it is the “best” option. High-MERV filters are incredibly dense. If your furnace’s blower motor isn’t designed to handle that level of resistance, it can restrict airflow just as badly as a dirty, clogged filter. For most standard residential systems, a MERV 8 filter is the sweet spot for maintanence and efficiency.
How to Find Your Filter Size
You cannot guess your filter size. If it is too small, dirty air will bypass the filter entirely and clog your system. If it is too large, it simply won’t fit into the slot.
The easiest way to find your size is to look at the filter currently inside your furnace. The dimensions are almost always printed in bold text along the cardboard edge of the frame (for example: 16x25x1 or 20x20x1).
If there is no filter currently installed, or if the writing has faded, grab a tape measure and measure the actual opening of the filter slot. Round those numbers up to the nearest whole inch to find your nominal filter size.
Step-by-Step Guide: How to Change a Furnace Filter for the First Time
Now that you have purchased the correct replacement filter, it is time to install it. Follow these steps carefully to ensure a safe and proper installation.
Step 1: Turn Off the Power
Safety first, always. Before you touch anything on your HVAC system, turn off the power. You can do this by flipping the dedicated switch located on or right next to the furnace chassis (it often looks just like a standard light switch). If your furnace doesn’t have an external switch, locate your home’s main electrical breaker panel and flip the circuit breaker labeled “Furnace” or “Heating” to the OFF position. Working on a live unit risks electrical shock or accidental activation of the blower motor while your hands are inside the housing.
Step 2: Locate the Filter Slot
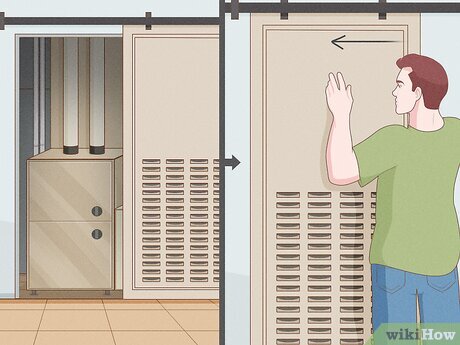
Your furnace filter is typically housed in a slot where the return air duct meets the main furnace cabinet. Look for a narrow metal cover, a removable door, or an open slot right on the side, top, or bottom of the furnace unit. In some home layouts, especially if your furnace is in an attic or horizontal crawlspace, the filter might actually be located behind the main return air grille on your wall or ceiling rather than inside the furnace itself.
Step 3: Remove the Old Filter
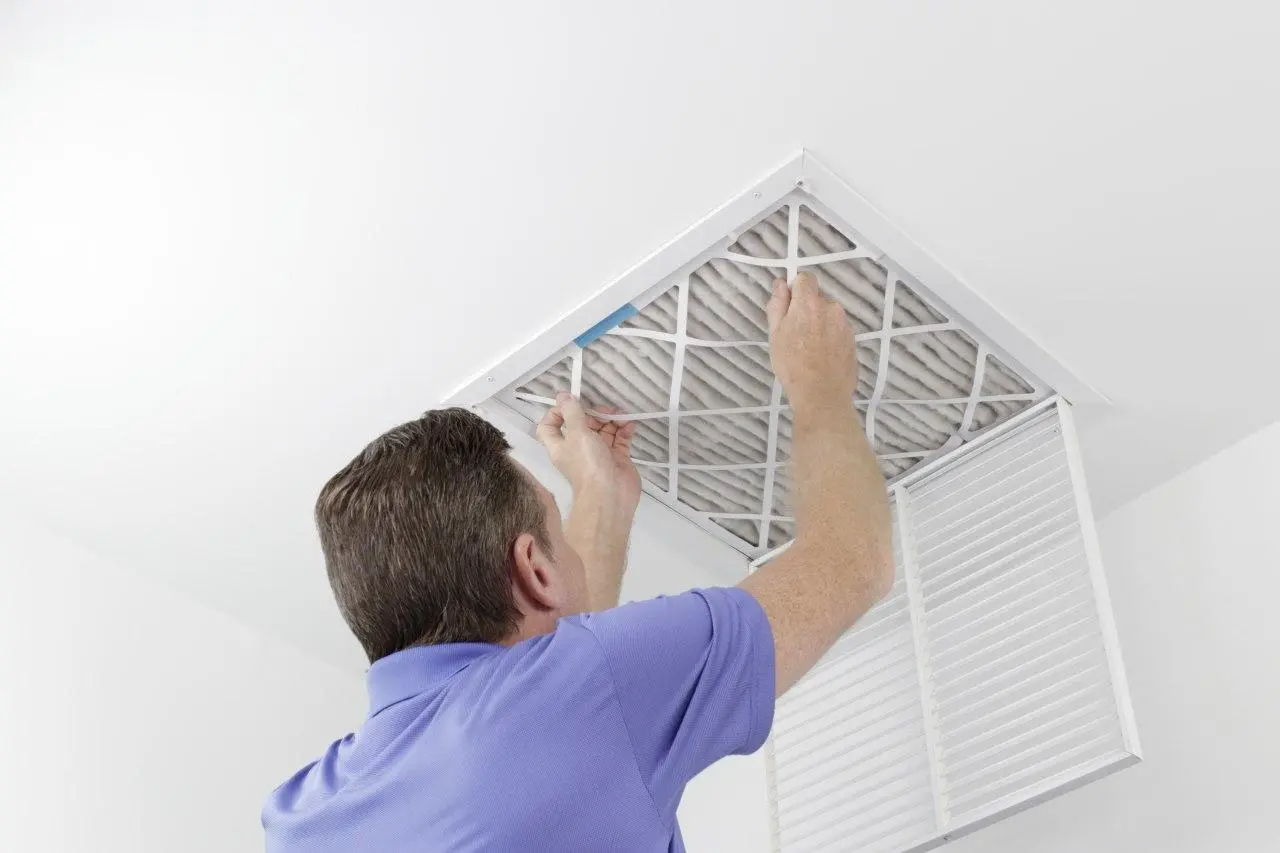
Slide the old filter out of its slot. Be gentle here—if your old filter is heavily covered in thick dust, pet fur, and debris, pulling it out too quickly can release a cloud of dust right into your face or onto your clean floors. Take a quick look at the filter. If it is dark grey and caked with dust, it was definitely time for a change.
Step 4: Note the Airflow Direction (Crucial Step!)
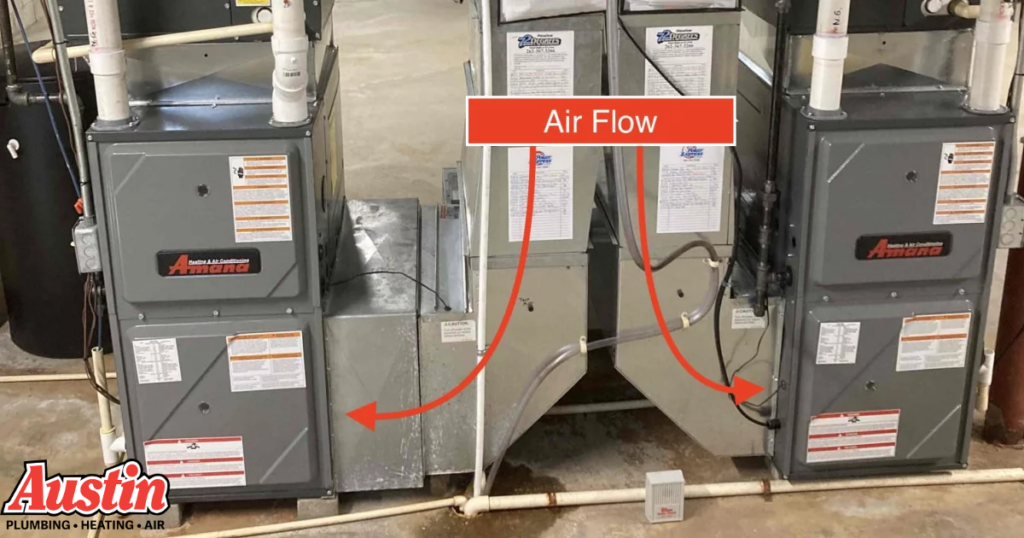
Before you throw the old filter in the trash, look closely at the cardboard frame. You will see one or two printed arrows indicating the direction of the airflow. Your new filter must face this exact same direction.
Air always flows from your living spaces, through the return ducts, through the filter, and then into the furnace blower to be heated or cooled. Therefore, the arrows must point toward the furnace unit itself, not away from it. If you install the filter backward, the reinforcement wire or mesh will be on the wrong side, which can cause the filter to buckle or collapse under pressure.
Step 5: Inspect and Slide in the New Filter
Take your new filter out of its plastic wrapping. Double-check that the size matches and locate the airflow arrows printed on the cardboard side. Orient the filter so that the arrows are pointing toward the furnace cabinet, then smoothly slide it into the slot. It should fit snugly without forcing it. If it bends or bunches up, stop and check for obstructions inside the track.
Step 6: Replace the Cover and Restore Power
If your furnace has a removable metal access door or a slot cover, slide it securely back into place. Once everything is sealed up, turn the furnace power switch or the circuit breaker back to the ON position. Turn your thermostat up a few degrees to trigger the furnace to start, and listen closely for any unusual whistling or rattling noises, which could indicate that air is escaping around an improperly seated filter.
Troubleshooting Common Furnace Filter Issues
Even a simple job can throw a curveball your way. If your experience doesn’t go exactly as planned, look at this quick troubleshooting matrix to identify the issue.
Filter Maintenance Matrix
Observation
Potential Root Cause
Corrective Action
Filter gets completely black within two weeks.
High presence of candle soot, fireplace ash, or heavy smoke indoors.
Reduce candle usage, check fireplace ventilation, and increase filter inspection frequency to every 30 days.
The filter is sucking into the furnace or bending.
The filter was installed backward, or the MERV rating is too high for the motor.
Turn off power, replace the bent filter, ensure correct arrow orientation, and consider dropping to a lower MERV rating.
Whistling noise coming from the filter slot after installation.
Air bypass caused by an imperfect fit or gaps around the filter frame.
Ensure the filter size is exactly correct. You can use specialized HVAC foam tape to seal minor gaps around the access door.
Look at the sides of the filter. One side will have a wire mesh or string grid. The side with the metal support mesh always faces the furnace.
Keeping a Consistent Maintenance Schedule
Now that you know how to change a furnace filter for the first time, your job isn’t completely finished forever. This is an ongoing part of homeownership. How often you need to repeat this process depends heavily on your lifestyle factors.
If you live alone in a home without pets, you can usually get away with changing your pleated filter every 90 days. However, if you have multiple dogs or cats, if someone in your family suffers from severe asthma or allergies, or if you live in an area prone to wildfire smoke or high dust, you should inspect your filter every 30 days and replace it as soon as a grey layer forms on the surface.
A great trick is to use a permanent marker to write the installation date directly on the visible edge of the cardboard frame when you put it in. That way, you never have to play the guessing game about when it was last serviced.
Wrap Up and Next Steps
Taking care of your home doesn’t have to break the bank. By taking ten minutes out of your day to change your own furnace filter, you keep your home cozy, preserve your indoor air quality, and keep your utility bills low while avoiding catastrophic system failures.
Remember, FixNest.xyz is your trusted online hub for practical, straightforward, and budget-friendly household maintenance guides. We believe that with the right advice, any homeowner or renter can tackle basic appliance repairs safely and confidently.
If you want to make sure you never forget your routine home checkups, go ahead and subscribe to our newsletter to receive friendly monthly appliance maintenance reminders directly to your inbox. Did you run into an unexpected issue while trying to swap out your filter, or are you having trouble figuring out which way your air flows? Leave a comment down below, and one of our resident appliance experts will help you figure it out!