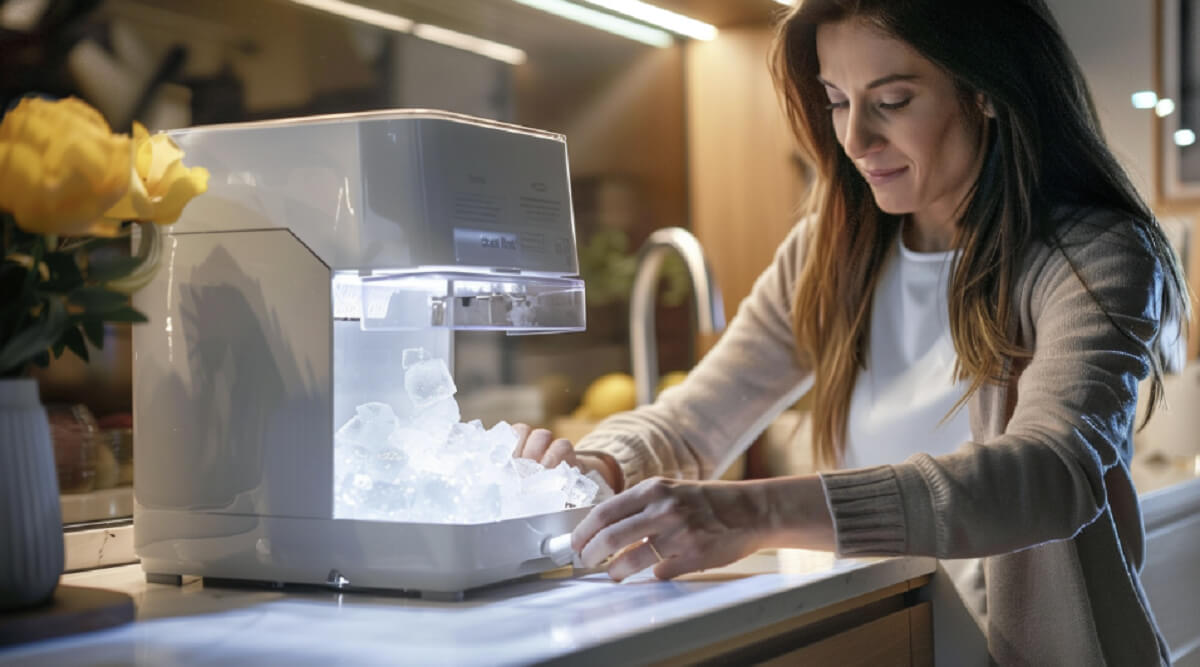
Learn how to maintain counter top ice makers for clear ice. Prevent cloudy cubes, fix scale buildup, and extend your machine’s lifespan safely.
How to Maintain Counter Top Ice Makers for Clear Ice: The Master Technician Guide
Look, I get it, appliance maintenance is boring but breaking out a portable ice machine for a summer party only to serve cloudy, soft, funky-tasting ice cubes is highly disappointing. Here is the real talk: portable countertop ice makers are absolute lifesavers when you have a crowded house or a small freezer, but they are notorious magnets for mineral scale, slime, and black mold.
Because these compact machines constantly recycle water through a chilled evaporator grid, any impurities in the water or airborne dust in your kitchen will quickly concentrate inside the internal water reservoir.
Before you know it, your ice cubes change from beautiful, crystal-clear gourmet cylinders into hazy, brittle chunks that melt in seconds and ruin the flavor of your favorite beverages.
As a senior technician, I see people throw away perfectly good portable ice units every year because they assume a drop in ice production or cloudy cubes means the compressor is dead. Most of the time, the machine is simply choked with calcium scaling or a dirty internal water sensor.
In this comprehensive maintenance playbook for FixNest.xyz, I am going to teach you exactly how to maintain counter top ice makers for clear ice safely, ensuring crystal-clear cubes, maximizing freezing speed, and saving you from buying expensive replacements.
The Science of Clear Ice: Why Your Machine Is Producing Cloudy Cubes
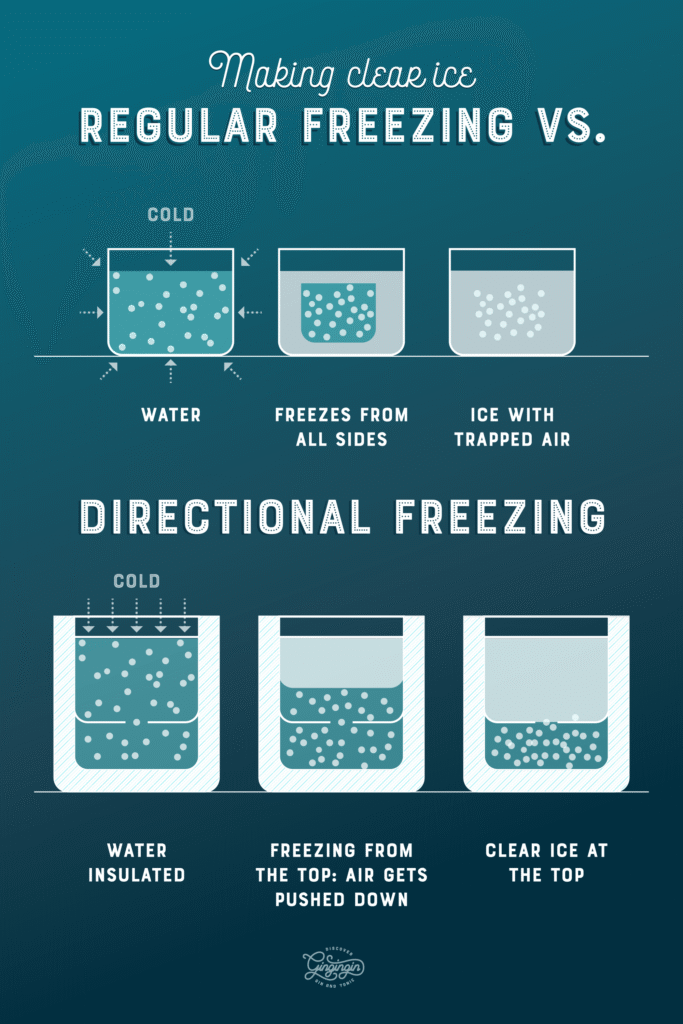
To understand how to keep your ice crystal clear, you need to understand how ice is formed inside a countertop unit. Most standard built-in freezer molds freeze water from all sides at once, trapping tiny air bubbles and dissolved mineral deposits right in the center. This is what creates that classic white, hazy core.
Premium countertop clear ice makers, however, drop clear ice by cascading a continuous sheet of cold water over a freezing cold vertical evaporator plate. The pure water molecules freeze first at 0°C (32°F), while the minerals, gases, and impurities are washed down into the lower reservoir.
However, if you don’t clean the unit regularly, those washed-away minerals accumulate in the reservoir water loop. When the mineral concentration gets too high, the machine can no longer separate the pure water from the hard water minerals.
The result? Brittle, cloudy cubes that cause the internal mechanical lifter arms to jam. At FixNest.xyz, we focus on proactive care so you can stop mineral scaling from burning out your small water pump and cooling fan.
Countertop Ice Maker Maintenance and Water Quality Schedule
Keeping your ice production crystal clear requires a routine maintenance cadence. Use this technician-approved schedule based on your household’s primary water source to keep your unit operating efficiently.
| Water Supply Type | Mineral Content Level | Required Deep Clean Frequency | Recommended Action Item |
| Tap Water (Municipal) | Moderate to High (Hard) | Every 2 to 3 weeks | Run an organic descaling cycle; wipe down the water sensor pin. |
| Filtered Water (Pitcher/Fridge) | Low to Moderate | Every 4 to 6 weeks | Perform a standard vinegar flush; clean the air intake grille. |
| Distilled / Reverse Osmosis | Zero to Ultra-Low | Every 6 to 8 weeks | Sanitize with a mild food-safe solution to prevent bacterial slime. |
The Non-Toxic Descaling and Sanitizing Solution
You should never use harsh industrial chemical cleaners or heavy bleach inside an ice maker. Bleach can degrade the internal food-safe plastic moldings and ruin the delicate nickel plating on the freezing prongs.
Instead, the absolute best homemade solution for descaling an ice machine safely consists of Pure White Distilled Vinegar and Warm Distilled Water mixed at a 1:1 ratio.
The natural acetic acid in the vinegar safely breaks down magnesium and calcium scale without damaging the plastic water lines or leaving behind a toxic chemical residue that could make your family sick.
Step-by-Step Guide: How to Maintain Counter Top Ice Makers for Clear Ice
Let’s walk through the exact technician-approved cleaning and descaling proccess. Gather your supplies, clear off a flat countertop space near your sink, and let’s get your ice looking perfectly transparent again.
Step 1: Kill the Electrical Power and Empty the Unit
Safety is always your very first priority when dealing with an appliance that combines a water pump with electrical circuits. Unplug the unit’s power cord directly from the wall outlet. Remove the removable ice storage basket and dump any remaining ice cubes into your sink.
Step 2: Drain the Internal Water Reservoir Completely
Locate your machine’s main water drain plug. Depending on your specific brand and model, this will either be a soft silicone cap hidden underneath the very front edge of the machine, or a small rubber drain spout located on the rear or side panel. Place the ice maker near the edge of your kitchen sink, pull the drain plug out, and let all the stagnant reservoir water empty completely into the drain.
Step 3: Run the Homemade Descaling Flush Cycle
Once the old water has drained away, replace the rubber plug securely.
- Pour your 1:1 mixture of warm distilled water and white vinegar directly into the main water reservoir up to the maximum fill line.
- Plug the ice maker back into the electrical outlet.
- If your machine has a built-in “Clean” mode, press and hold the power or clean button for 5 seconds to activate the automatic descaling loop. This proccess will run the vinegar solution through the pump, water tubes, and over the evaporator plate for about 10 to 15 minutes without running the cooling compressor.
- Technician Pro-Tip: If your unit doesn’t have a dedicated clean button, simply turn the machine on and let it run two normal ice-making cycles using the vinegar mix. Throw away the first two batches of sour, vinegary ice cubes that are produced.
Step 4: Manually Scrub the Evaporator Prongs and Water Lines
Unplug the power cord once again and drain out the used vinegar solution. Minerals love to harden right on the metal freezing pins where the ice is formed.
- Dip a clean, soft-bristled toothbrush directly into pure white vinegar.
- Gently scrub the vertical evaporator plates or metal prongs located at the top rear of the machine cavity.
- Wipe down the plastic water dump tray and the internal walls of the reservoir to lift off any yellowed bacterial slime layer or dark mold spores.
Step 5: Clean the Hidden Infrared Eye Water Sensors
Look closely inside the walls of the ice basket housing. Your going to see two tiny, clear plastic lenses facing each other. These are infrared sensors that tell the computer brain when the ice basket is full or when the water level is empty. Over time, mineral scale will cloud these lenses, making the machine think it is full when it isn’t. Take a cotton swab dipped in rubbing alcohol and gently polish these lenses until they are completely clear.
Step 6: Clear Dust From the Air Intake Condenser Grille
An ice maker relies on heavy airflow to reject heat and freeze water quickly. Look at the side or back of your unit where the cooling fan sits. If the mesh ventilation slots are choked with dust and pet hair, your compressor will overheat, resulting in slow freezing times and small, cloudy cubes. Take your vacuum cleaner’s soft brush attachment and suck all the accumulated lint out of the grilles to restore full thermodynamic efficiency.
Step 7: Rinse and Flush the System Thoroughly
To ensure your next batch of ice doesn’t taste like salad dressing, replace the drain plug and fill the reservoir to the max line with fresh, pure water. Plug the unit in and run another clean or cycle loop for 5 minutes. Drain the water completely. Repeat this fresh-water rinse process twice to fully remove all residual vinegar acids from the internal pump impeller and lines.
Step 8: Final Wipe Down and Reassemble
Take a clean microfiber towel and dry the internal plastic walls and the removable ice basket. Reinstall the basket, replace the bottom drain plug one last time, fill the reservoir with pure water, and activate the machine. Within 15 minutes, your unit will start dropping hard, perfectly shaped, crystal-clear ice cylinders that are completely odor-free.
Proactive Habits for Flawless Ice Machine Performance
Now that you have executed a professional-grade maintanence routine, practicing these smart habits will ensure your counter top ice machine keeps producing clear ice week after week:
- Switch to Distilled Water: If you want truly clear ice, stop using hard tap water. Hard water minerals cause rapid scaling. Using distilled or reverse-osmosis filtered water minimizes cloudiness and significantly reduces how often you need to scrub the machine.
- The 24-Hour Fresh Water Rule: Never let water sit inside the reservoir for days at a time without running the machine. Stagnant water collects airborne mold spores and room dust, leading to slime development. If you aren’t going to use the machine for a few days, always pull the drain plug and let it dry out completely.
- Maintain Clear Spatial Clearance: Never push your portable ice maker flush against a wall or right next to a hot toaster or oven. Leave at least 3 to 5 inches of open space around all ventilation grilles so the internal fan can reject heat properly. Cool air equals harder, clearer ice.
Your Home Appliance Master Resource
Learning how to maintain counter top ice makers for clear ice is an excellent way to elevate your hosting game while extending the operational lifespan of your small kitchen appliances. By investing just a little bit of regular attention and applying targeted, non-toxic cleaning strategies, you keep your kitchen running efficiently and avoid spending cash on costly replacement units.
If any other appliance in your kitchen or utility room starts causing problems—whether it is a microwave turntable that refuses to rotate, a refrigerator that isn’t cooling down to the proper temperature, or a washing machine that makes a terrible banging noise during the spin cycle—remember that you don’t have to tackle the repair alone. We curate easy-to-use, professional-grade diagnostic and maintenance walk-throughs right here on FixNest.xyz to guide you through every domestic fix.
Please take a moment to bookmark FixNest.xyz right now so you always have a seasoned technician standing by in your corner whenever a major household appliance malfunctions. If you want to maximize the performance of your home equipment and save money on component repairs, subscribe to our monthly newsletter for highly practical, seasonal appliance care reminders sent directly to your screen.
Did you run into a weird error light on your control display panel while trying to run your cleaning cycle today? Is your portable ice machine still dropping small, malformed cubes even after a deep descaling session? Leave a comment down below with your ice maker’s exact brand and model number—our supportive community of passionate DIYers and seasoned appliance technicians will jump right in to help you troubleshoot your system safely!